
With Blender 5 introducing its brand-new Grid system, we’ve suddenly unlocked a whole new category of effects that weren’t possible in Blender before, at least not without Houdini-level workflows or a lot of technical gymnastics.
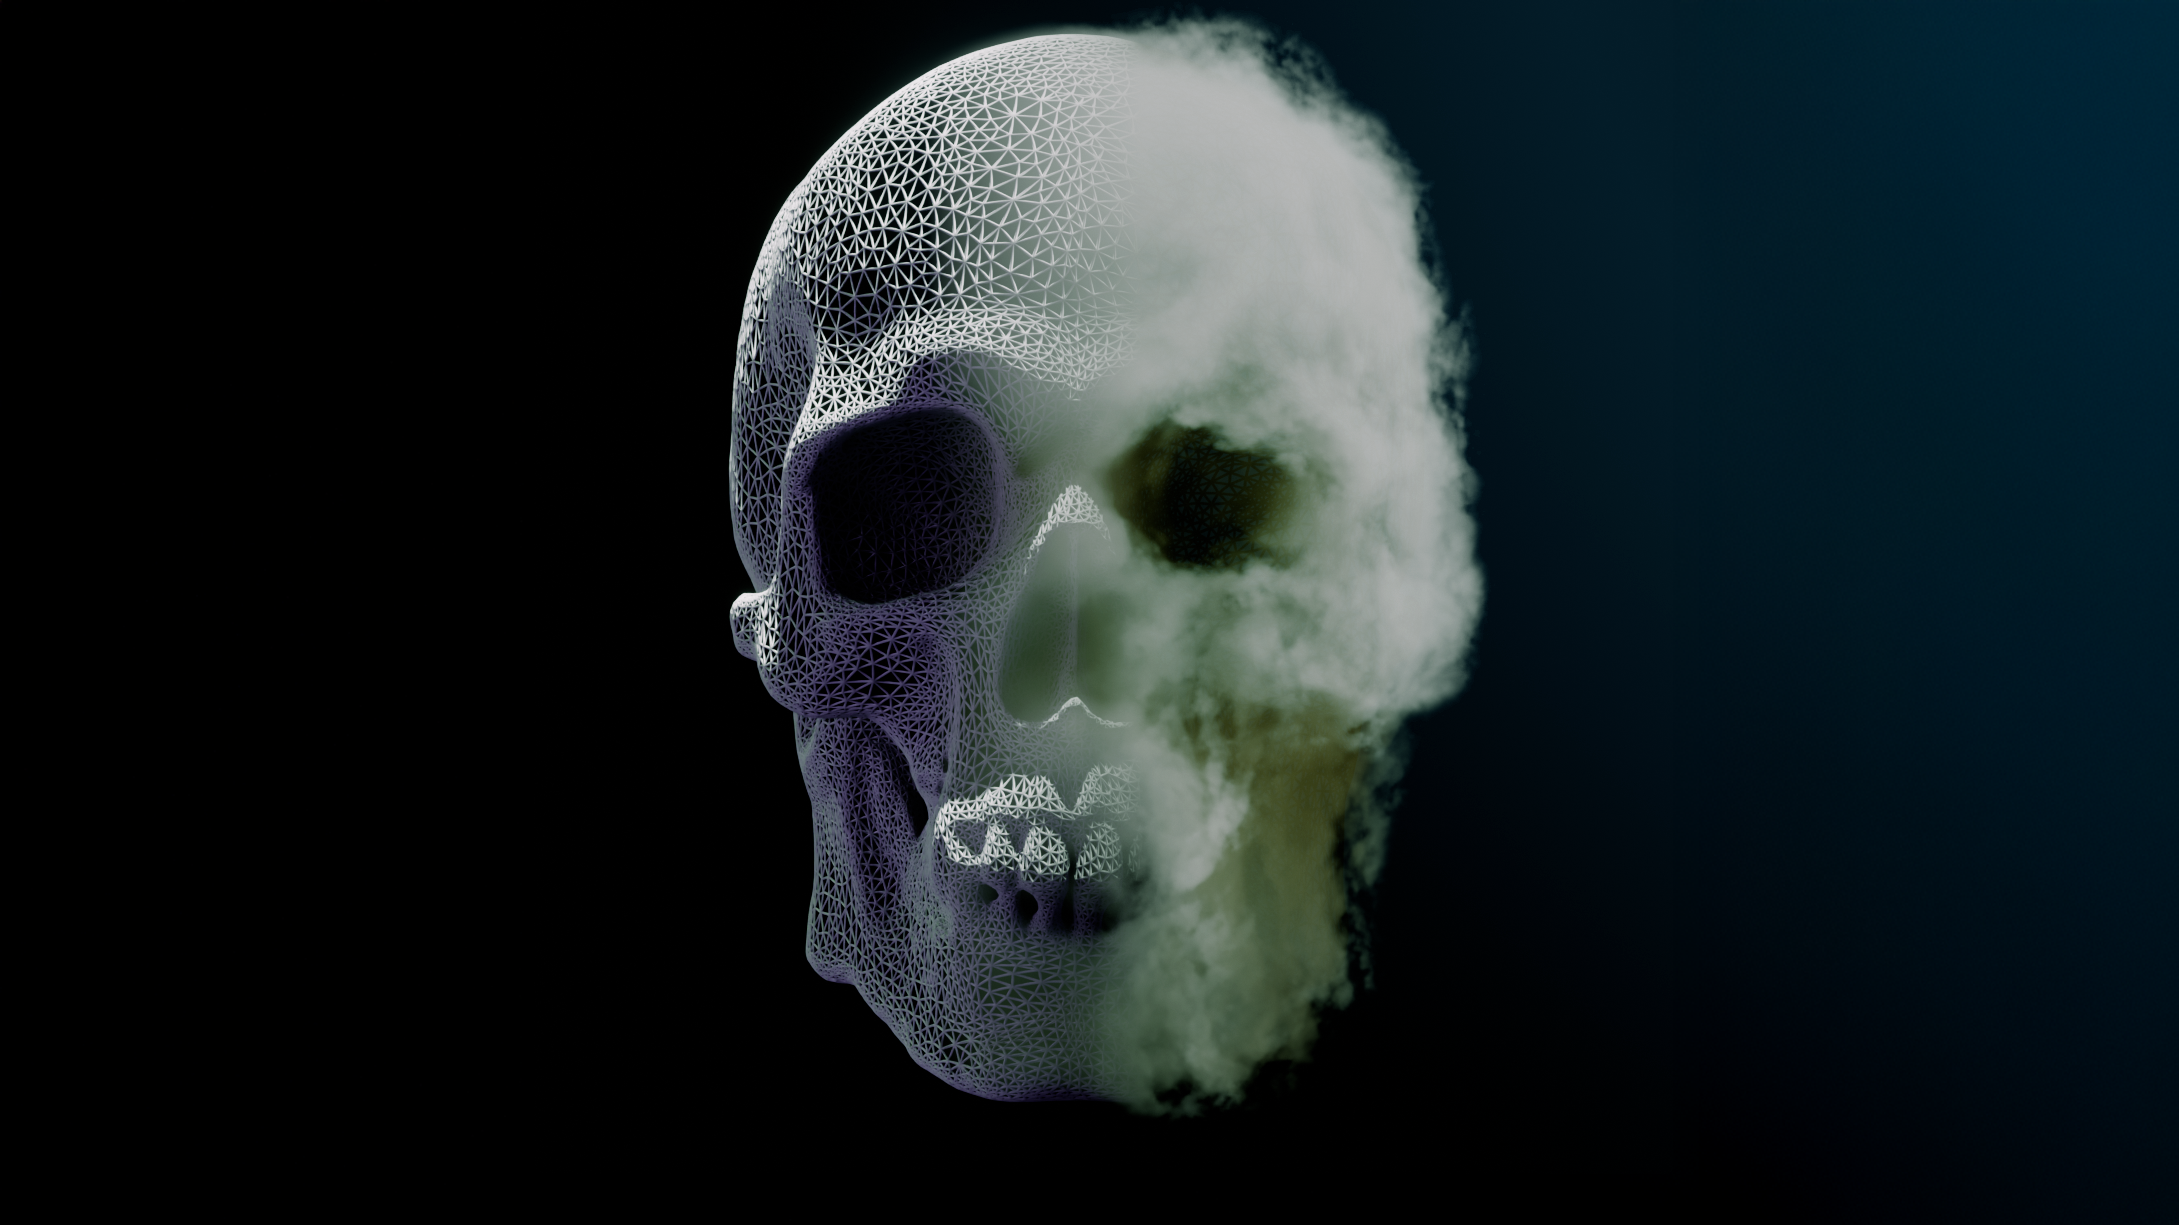
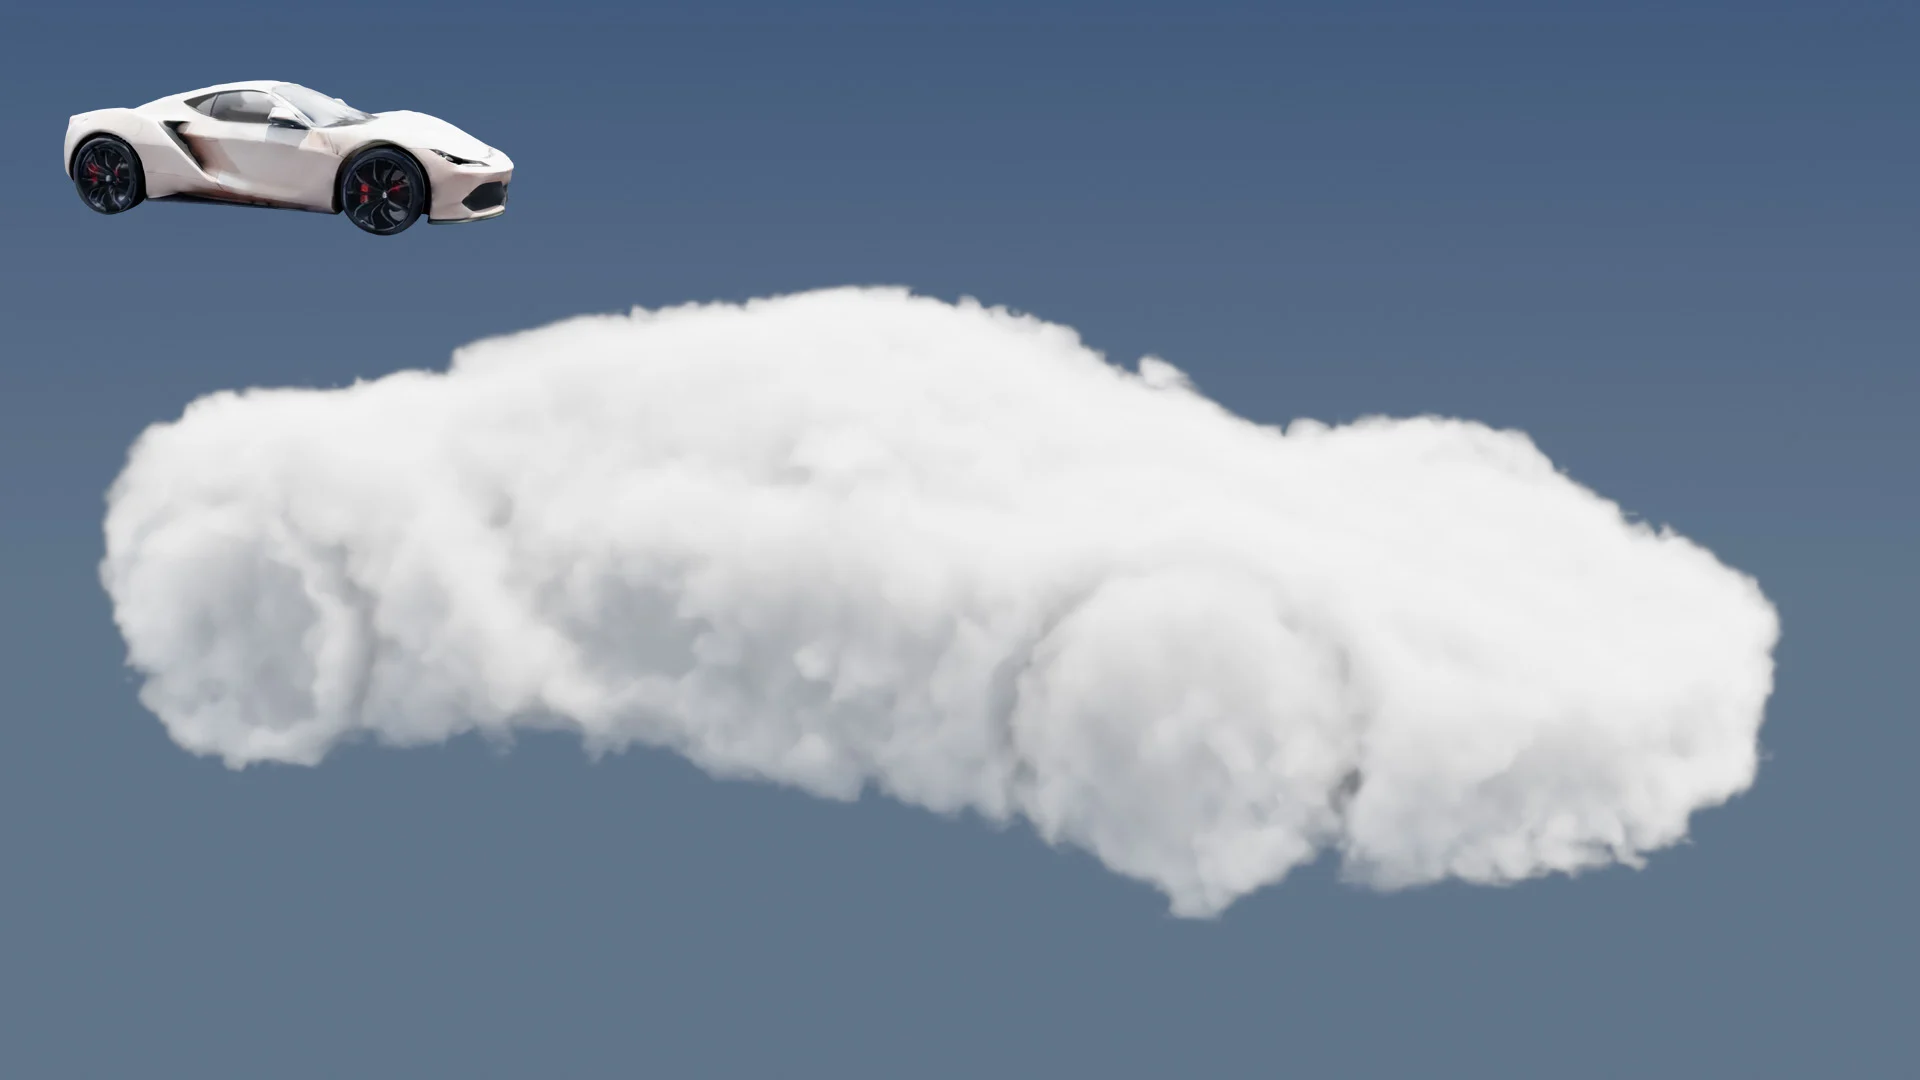
One of the most exciting of these is volume displacement, the ability to take any mesh and distort it into a fully volumetric, cloud-like form.
This is something I’ve personally been waiting for years to explore properly in Blender, and in this post I want to walk through what the technique is, why it’s so interesting, and how you can try it yourself.
What is Volume Displacement?
Traditionally, volumes in Blender have been limited to voxel grids imported from elsewhere (e.g., simulations, OpenVDB files) or simple procedural shaders. With Blender 5’s new Grid data type, we can now generate and modify volumetric data directly in Geometry Nodes.
This means you can:
- Convert any watertight mesh into a density field
- Manipulate that field with noise, curl noise, or custom logic
- Push and pull voxels around to create wispy, cloud-like forms
- Render the result in Cycles as a fully physical volume
- Even bake it out as a VDB for use in other software
It’s surprisingly intuitive once you understand the concept, and creatively, it opens up a huge number of possibilities.
Watch the Full Tutorial
I’ve put together a detailed video walkthrough covering the entire setup from start to finish:
In the video I cover:
- What the new Grid system is
- How to convert a mesh into a density grid
- How noise fields can drive organic volumetric distortion
- Why we use curl noise for direction
- How to optimise the bounding volume for better performance
- How to preview and light volumes in Cycles
- How to bake the result to a
.vdbfile
If you want to understand the technique properly, this is the best place to start.
⚠️ A Quick Warning Before You Dive In
It’s worth mentioning that this technique isn’t for the faint-hearted.
Volume displacement in Blender 5 is both conceptually involved and processor-intensive, especially when working with small voxel sizes. Even on higher-end machines, you may experience slow updates, heavy GPU usage, and long bake times. This workflow leans heavily on Blender’s new Grid system, which is powerful but still demanding so expect a bit of patience (and a capable PC) to be part of the process.
Still, once everything comes together, the results are absolutely worth it.
Introducing Cloudify: A Modifier That Turns Meshes Into Clouds
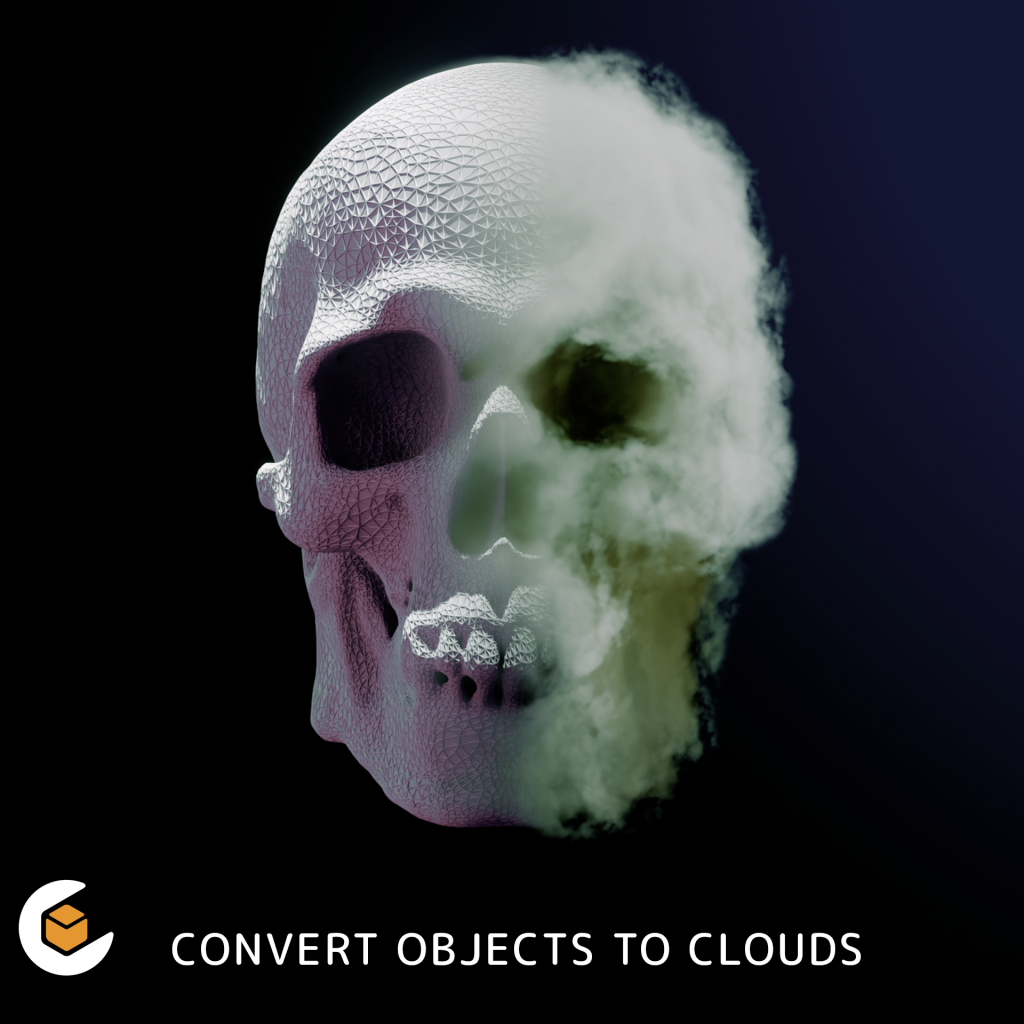
After experimenting with the grid workflow, I bundled the entire setup into a neat, easy-to-use modifier called Cloudify.
If you’d like to experiment with mesh-to-cloud transformations without building the node tree yourself, Cloudify offers:
- A non-destructive modifier
- Adjustable voxel size, density, expand, and gradient controls
- Built-in noise shaping (Standard, Voronoi, or Custom)
- Curl noise displacement
- Full VDB export using Blender’s Bake node
- High-quality example scenes
- A good foundation for your own experiments
It’s very much aimed at users comfortable exploring Blender’s new volumetric tools, and is designed as both a modifier asset and a learning resource.
👉 Try Cloudify Here
Why This Technique Is Exciting
Volume displacement isn’t just a party trick. It has real creative applications:
- Stylised VFX (dissolves, apparitions, dream sequences)
- Cloud creatures and volumetric characters
- Atmospheric props and environmental storytelling
- Concept art sculpting with fog
- Scientific and abstract volumetric visualisation
- Floating “cloud cities” or surreal architecture
- Logo/introduction animations
- Exporting VDBs for Houdini, Unreal, or film pipelines
Blender 5’s grid system makes these workflows accessible without requiring a dedicated simulation tool.
Final Thoughts
I’m only just scratching the surface of what Blender’s new Grid system can do.
Volumetric modelling opens the door to entirely new artistic directions: from surreal atmospheric scenes to cinematic VFX and anything in between.
If you’re curious:
- Watch the tutorial to understand the workflow
- Try Cloudify if you want a ready-made modifier to experiment with
- And feel free to ask questions or share your experiments: I’d love to see what people create with this technique.