I’m happy to share a fresh new update to Perspective Plotter, bringing a small but very practical improvement to the workflow.
Move Vanishing Points More Directly
Until now, vanishing points in Perspective Plotter were adjusted primarily through the control points and guide handles, which works well, but can sometimes feel a little indirect when you’re fine-tuning a scene.
With this update, you can now move vanishing points directly in the viewport, making perspective setup faster, clearer, and more intuitive.
It’s a simple change, but one that gives you much more immediate control when matching cameras to:
concept art
photo backplates
architectural reference
hand-drawn sketches
or any perspective-based scene layout
Works with Existing Blender Versions
As always, the update is designed to be fully compatible with existing Blender installs, so you should be able to try it immediately in your current workflow without needing to change anything else.
Give It a Try!
If you already own Perspective Plotter, the update is available now, just download the latest version from your Superhive library and take it for a spin.
If you encounter any bugs, strange behaviour, or have ideas for further improvements, feel free to reach out. User feedback is invaluable and helps steer future development.
Thanks again to everyone using Perspective Plotter, I hope this update makes your perspective matching even smoother.
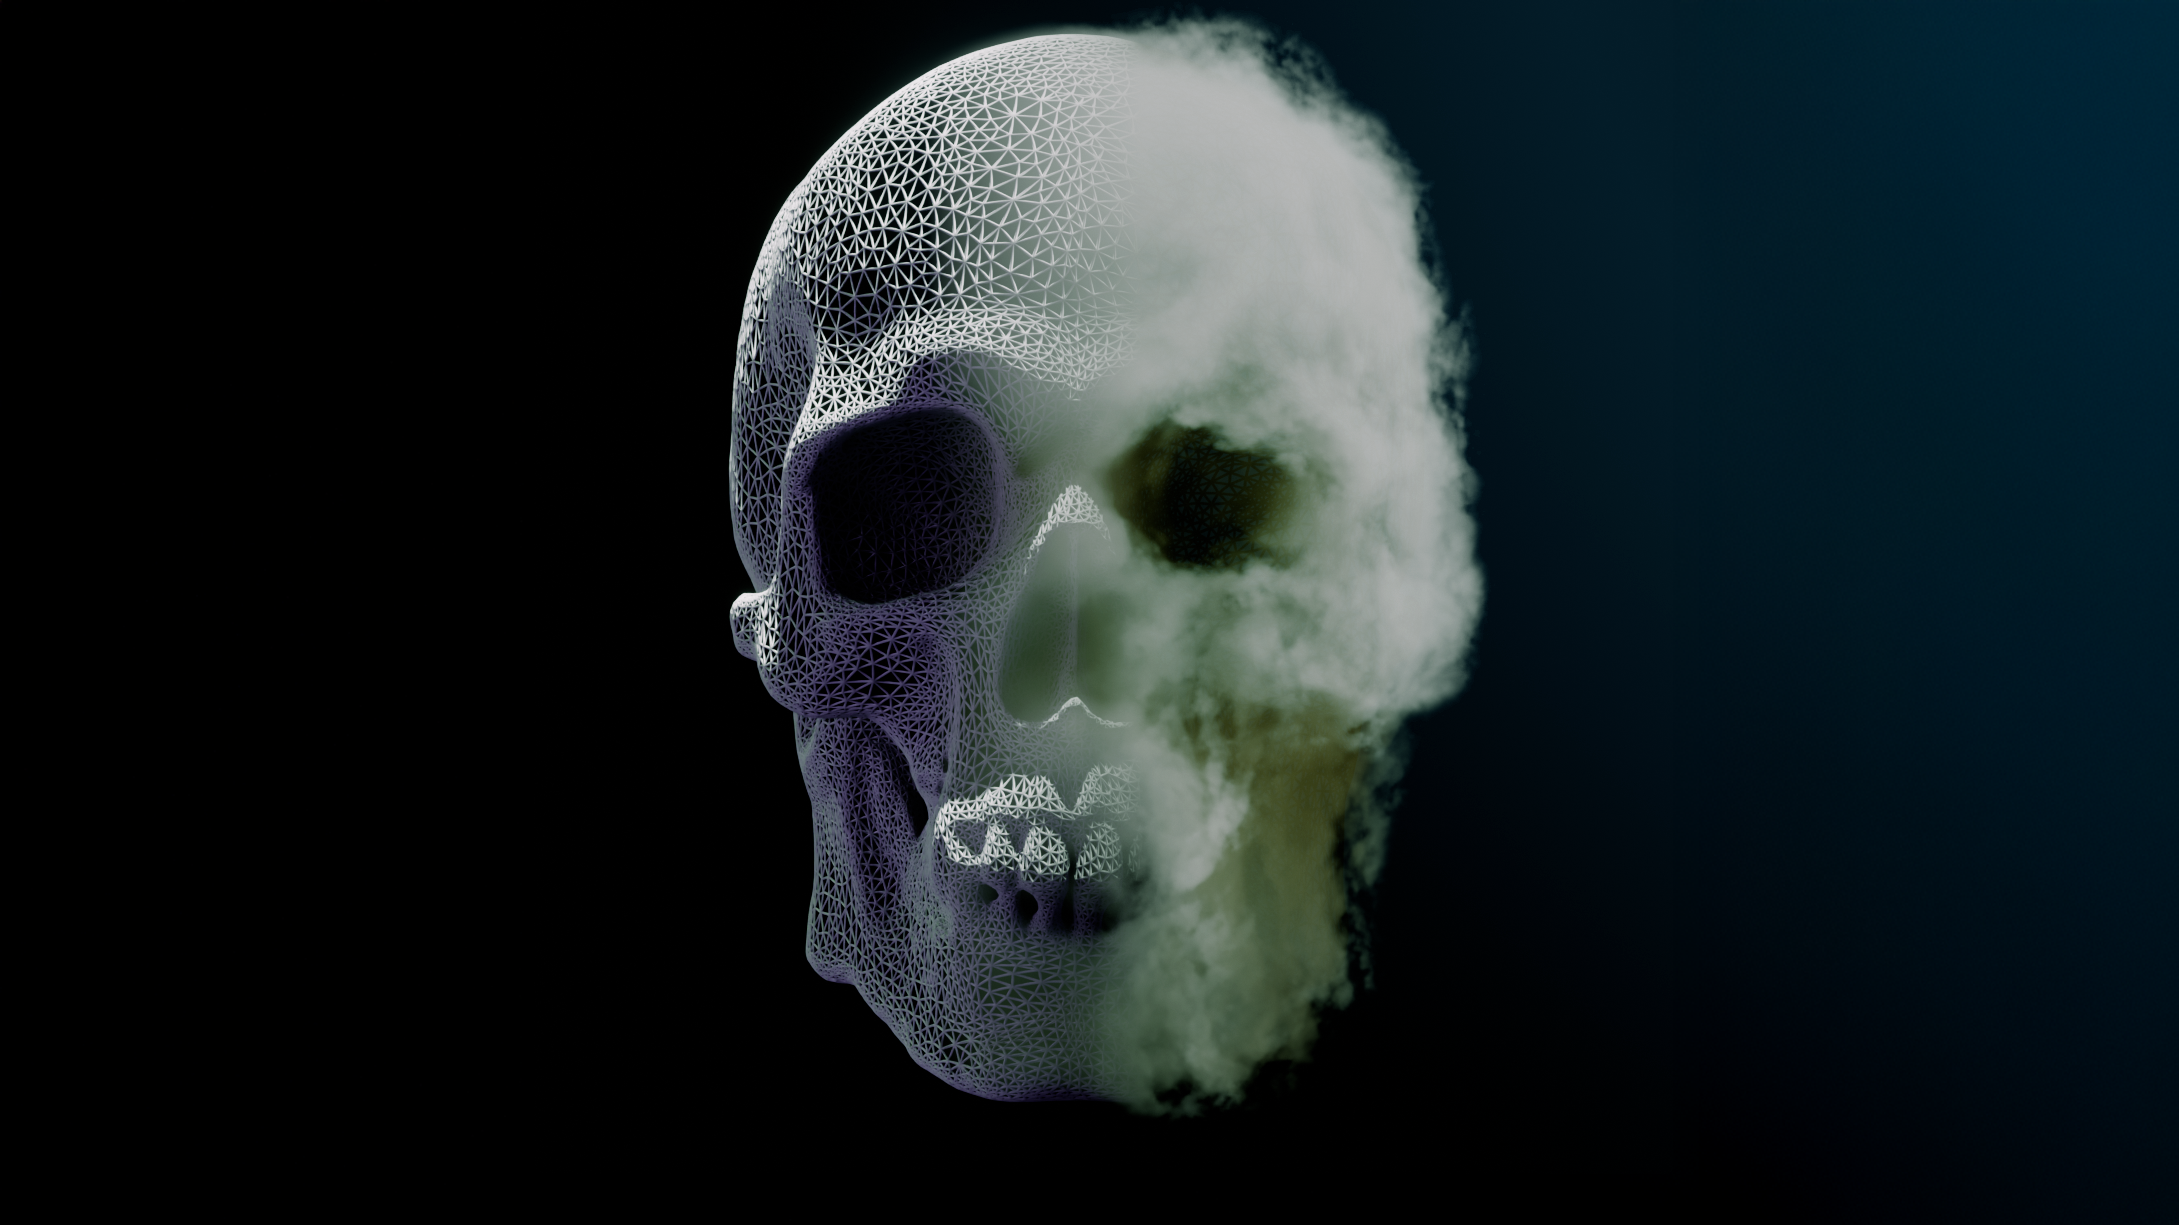
With Blender 5 introducing its brand-new Grid system, we’ve suddenly unlocked a whole new category of effects that weren’t possible in Blender before, at least not without Houdini-level workflows or a lot of technical gymnastics. One of the most exciting of these is volume displacement, the ability to take any mesh and distort it into a fully volumetric, cloud-like form.
This is something I’ve personally been waiting for years to explore properly in Blender, and in this post I want to walk through what the technique is, why it’s so interesting, and how you can try it yourself.
What is Volume Displacement?
Traditionally, volumes in Blender have been limited to voxel grids imported from elsewhere (e.g., simulations, OpenVDB files) or simple procedural shaders. With Blender 5’s new Grid data type, we can now generate and modify volumetric data directly in Geometry Nodes.
This means you can:
Convert any watertight mesh into a density field
Manipulate that field with noise, curl noise, or custom logic
Push and pull voxels around to create wispy, cloud-like forms
Render the result in Cycles as a fully physical volume
Even bake it out as a VDB for use in other software
It’s surprisingly intuitive once you understand the concept, and creatively, it opens up a huge number of possibilities.
Watch the Full Tutorial
I’ve put together a detailed video walkthrough covering the entire setup from start to finish:
In the video I cover:
What the new Grid system is
How to convert a mesh into a density grid
How noise fields can drive organic volumetric distortion
Why we use curl noise for direction
How to optimise the bounding volume for better performance
How to preview and light volumes in Cycles
How to bake the result to a .vdb file
If you want to understand the technique properly, this is the best place to start.
⚠️ A Quick Warning Before You Dive In
It’s worth mentioning that this technique isn’t for the faint-hearted. Volume displacement in Blender 5 is both conceptually involved and processor-intensive, especially when working with small voxel sizes. Even on higher-end machines, you may experience slow updates, heavy GPU usage, and long bake times. This workflow leans heavily on Blender’s new Grid system, which is powerful but still demanding so expect a bit of patience (and a capable PC) to be part of the process. Still, once everything comes together, the results are absolutely worth it.
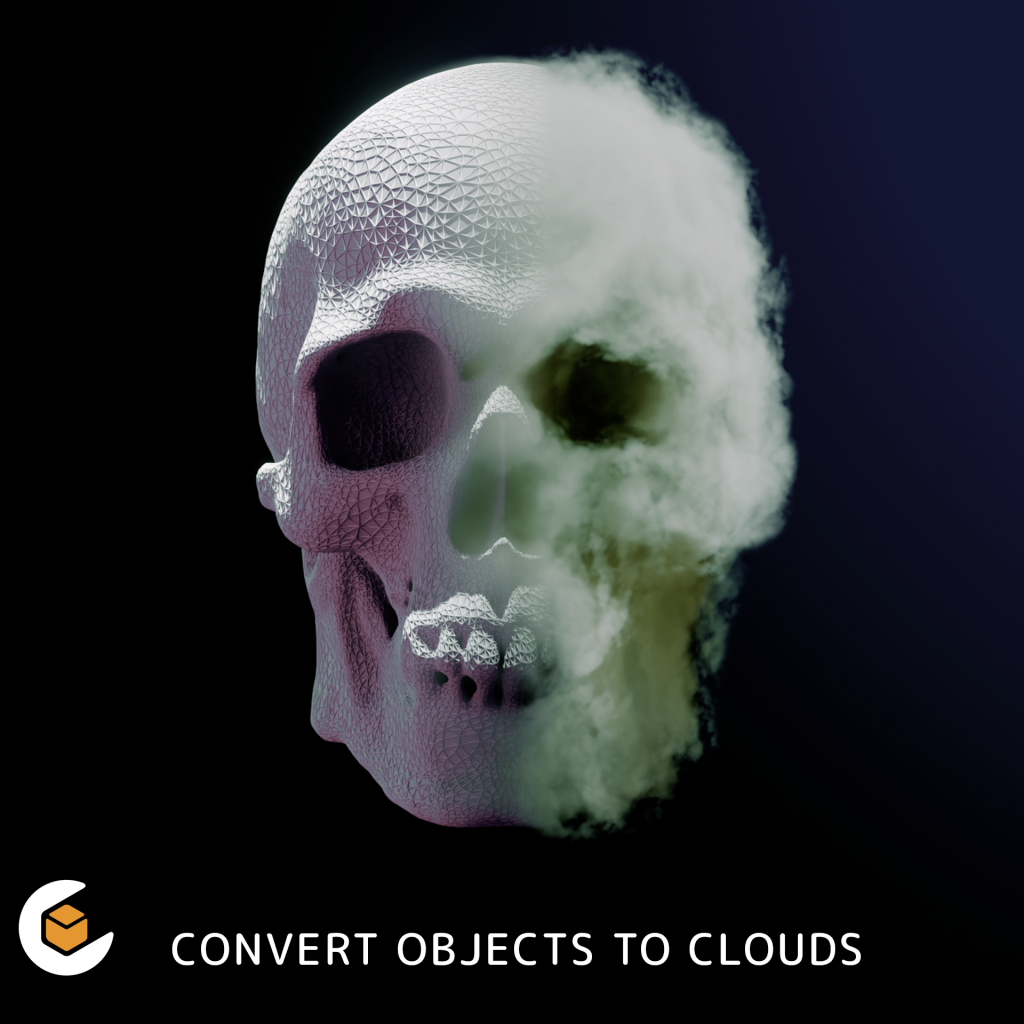
Introducing Cloudify: A Modifier That Turns Meshes Into Clouds
After experimenting with the grid workflow, I bundled the entire setup into a neat, easy-to-use modifier called Cloudify.
If you’d like to experiment with mesh-to-cloud transformations without building the node tree yourself, Cloudify offers:
A non-destructive modifier
Adjustable voxel size, density, expand, and gradient controls
Built-in noise shaping (Standard, Voronoi, or Custom)
Curl noise displacement
Full VDB export using Blender’s Bake node
High-quality example scenes
A good foundation for your own experiments
It’s very much aimed at users comfortable exploring Blender’s new volumetric tools, and is designed as both a modifier asset and a learning resource.
Exporting VDBs for Houdini, Unreal, or film pipelines
Blender 5’s grid system makes these workflows accessible without requiring a dedicated simulation tool.
Final Thoughts
I’m only just scratching the surface of what Blender’s new Grid system can do. Volumetric modelling opens the door to entirely new artistic directions: from surreal atmospheric scenes to cinematic VFX and anything in between.
Over the past year I’ve been working on something that started as a simple upgrade to Curves to Mesh and ended up growing into its own tool entirely.
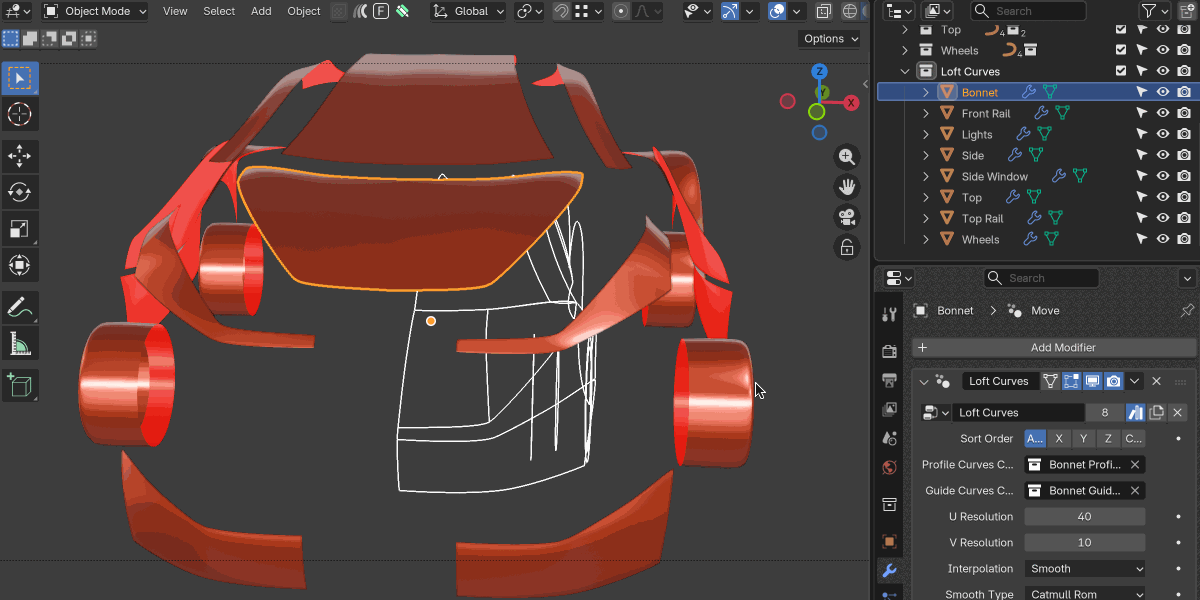
Today I’m pleased to share this new Blender add-on, Loft Curves.
Loft Curves is built for artists who prefer shaping with curves and want a more flexible, modifier-based approach to creating clean surfaces inside Blender. It lets you loft between two or more curves, guide the flow of the surface using additional curves, and adjust everything in real time thanks to a Geometry Nodes-driven modifier.
Why Loft Curves?
One of the recurring requests I’ve seen over the years is for a straightforward way to loft between curves directly in Blender—without needing to jump into external software, and without the overhead of manually building node setups.
During early development, the goal was to extend Curves to Mesh. But as the workflow developed, testers pointed out that this felt like a different modelling approach altogether. Curves to Mesh specialises in patch-based surface generation using split curve grids. Loft Curves, by contrast, is built for freeform lofting driven by multiple profiles, guide rails, and sweep curves.
Rather than cram both approaches into a single add-on (and compromise each), Loft Curves has been released as a separate companion tool.
Curves to Mesh will continue to be fully supported and developed. It remains the best choice for structured patch modelling, while Loft Curves focuses on intuitive, modifier-driven lofting between two or more curves.
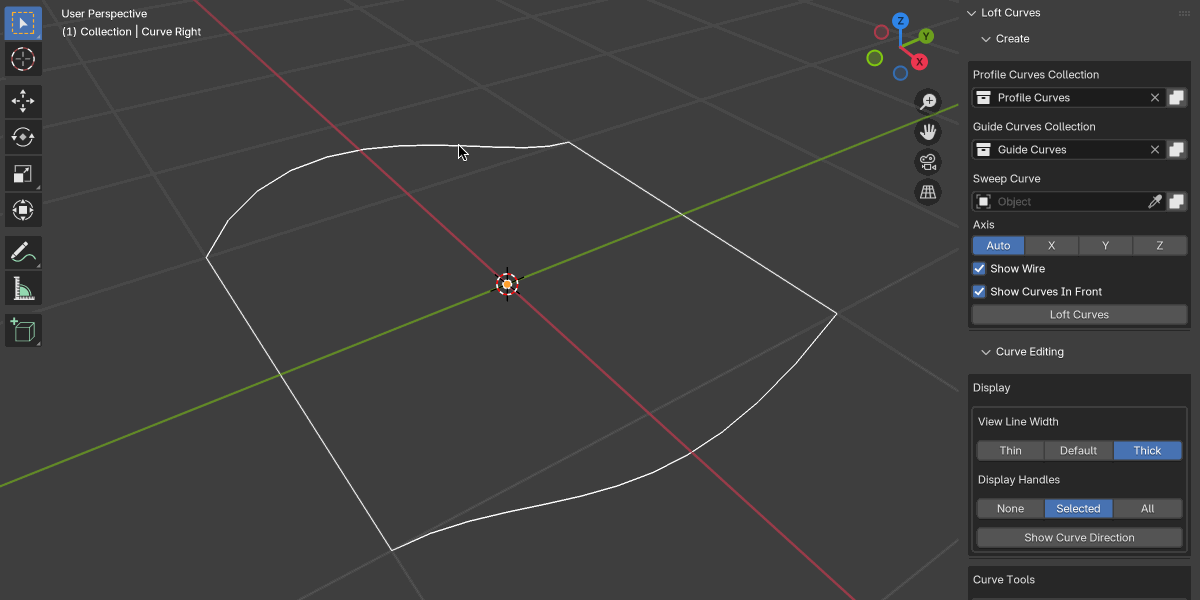
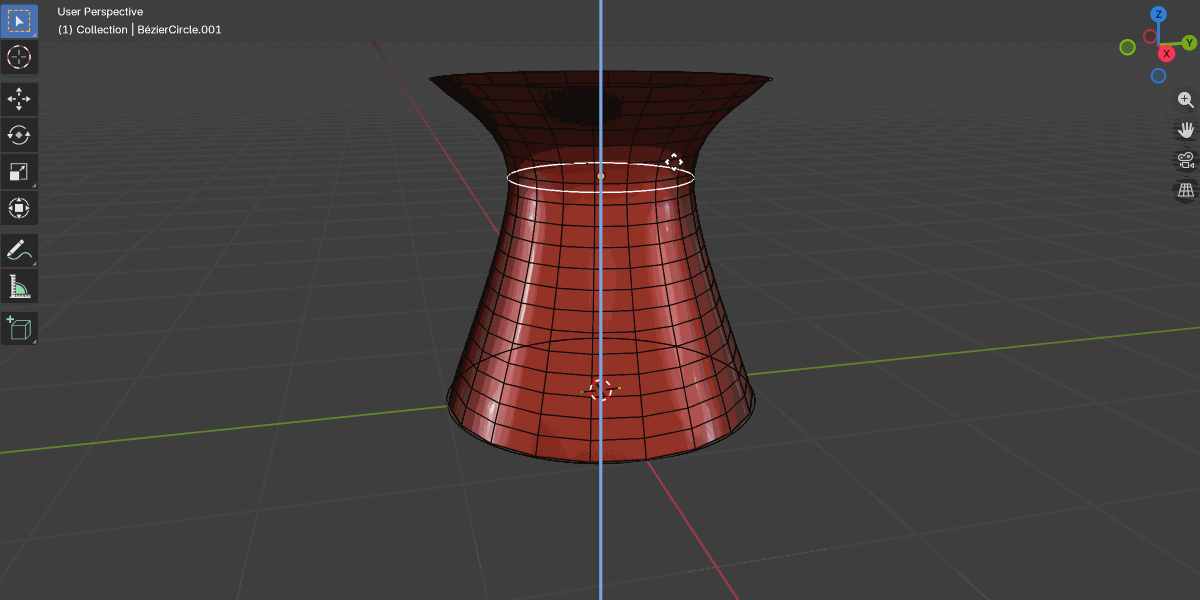
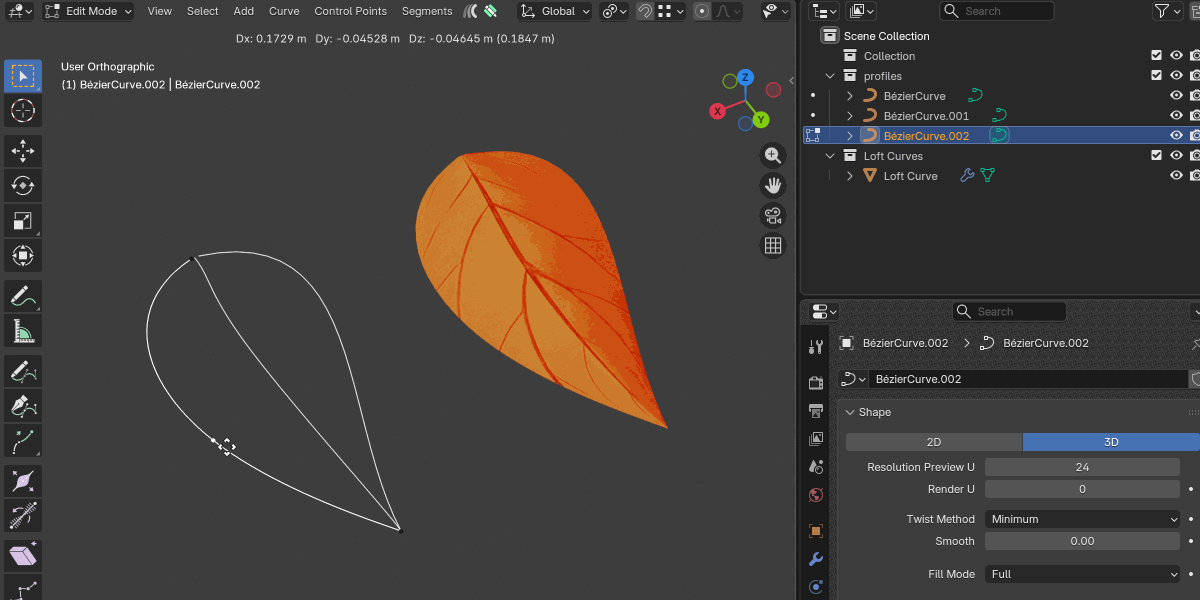
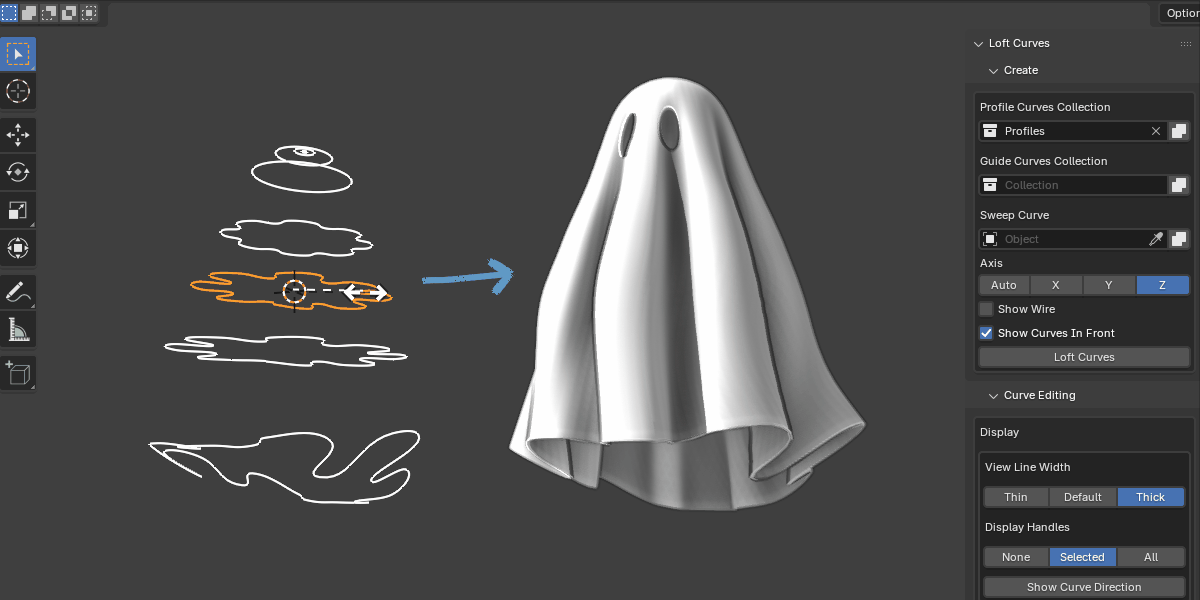
What Loft Curves Can Do
Here are some of the core features:
Modifier-Based Workflow
Loft Curves adds a custom Geometry Nodes modifier to your object. Adjust any curve and the surface updates instantly in the viewport.
Loft Between Multiple Curves
Use two, three, or more profile curves to generate the surface. Perfect for blocking out concepts quickly.
Guide Curves for Control
Add guide curves to refine how the loft transitions from one profile to another. Great for wings, hulls, footwear forms, and more complex shapes.
Profile + Sweep Tools
Choose or customise a sweep profile to control cross-sections along your shape.
UV Support
Loft Curves generates usable UVs to help with texturing and shading right away.
Flexible Applications
Product shells
Hard-surface concepts
Organic surfaces
Sci-fi paneling
Vehicle and aircraft components
Architectural forms
If you prefer to think in curves first and refine later, I hope you’ll find this workflow a good fit.
If you’re a Curves to Mesh user, you should already have received a dedicated discount code c2mloft as a thank you for your support over the years.
Final Thoughts
It’s been fascinating developing Loft Curves and seeing how artists approach curve-based workflows. The feedback from early testers helped shape this tool enormously, and I’m excited to see what the wider Blender community will create with it.
As always, thanks for your support and if you have questions, want to share your creations, or think of features you’d like to see next, feel free to get in touch.
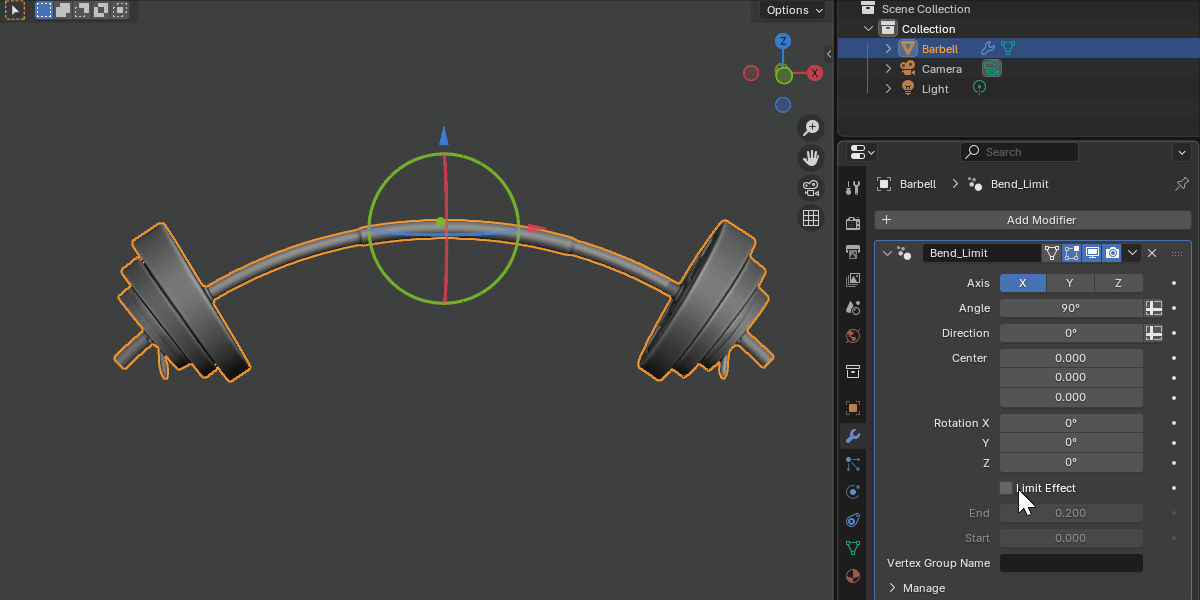
When I first built the Bend Modifier, I almost didn’t release it.
On the surface, it looked too simple, just a way to bend geometry in Blender. Behind the scenes though, it involved quite a lot of maths: arcs, tangents, limits, and all the fiddly details to make sure it behaved cleanly with tails, pivots, and arbitrary axes. Not as straightforward as some might have you believe.
I worried it might not be enough of a tool to stand on its own.
But since releasing it on Superhive(formerly Blender Market) just the other day, it’s taken off with over 200 downloads already. It turns out that sometimes the simple, focused tools are the ones people need most. Blender’s built-in Simple Deform has always been a bit awkward (one word: empties), so giving people a true modifier with a proper gizmo and real-world controls filled a gap I wasn’t sure existed until now.
The feedback has been great, from users coming over from 3ds Max who miss its bend modifier, to Blender modelers who just want a clean, UV-safe, stackable bend that doesn’t need extra objects cluttering the scene.
It’s been a reminder for me: even if a tool feels “too simple,” if it removes friction from everyday workflows, it can be valuable.
Here’s an introduction:
What’s next?
My next project is a major overhaul of Curves to Mesh. It’s just come out of testing and early feedback has been really positive. This one is a lot more complex under the hood, but I’ve learned not to underestimate the power of simple presentation paired with solid maths.
Thanks to everyone who’s tried the Bend Modifier so far, it’s been encouraging to see it bend its way into so many hearts so quickly.
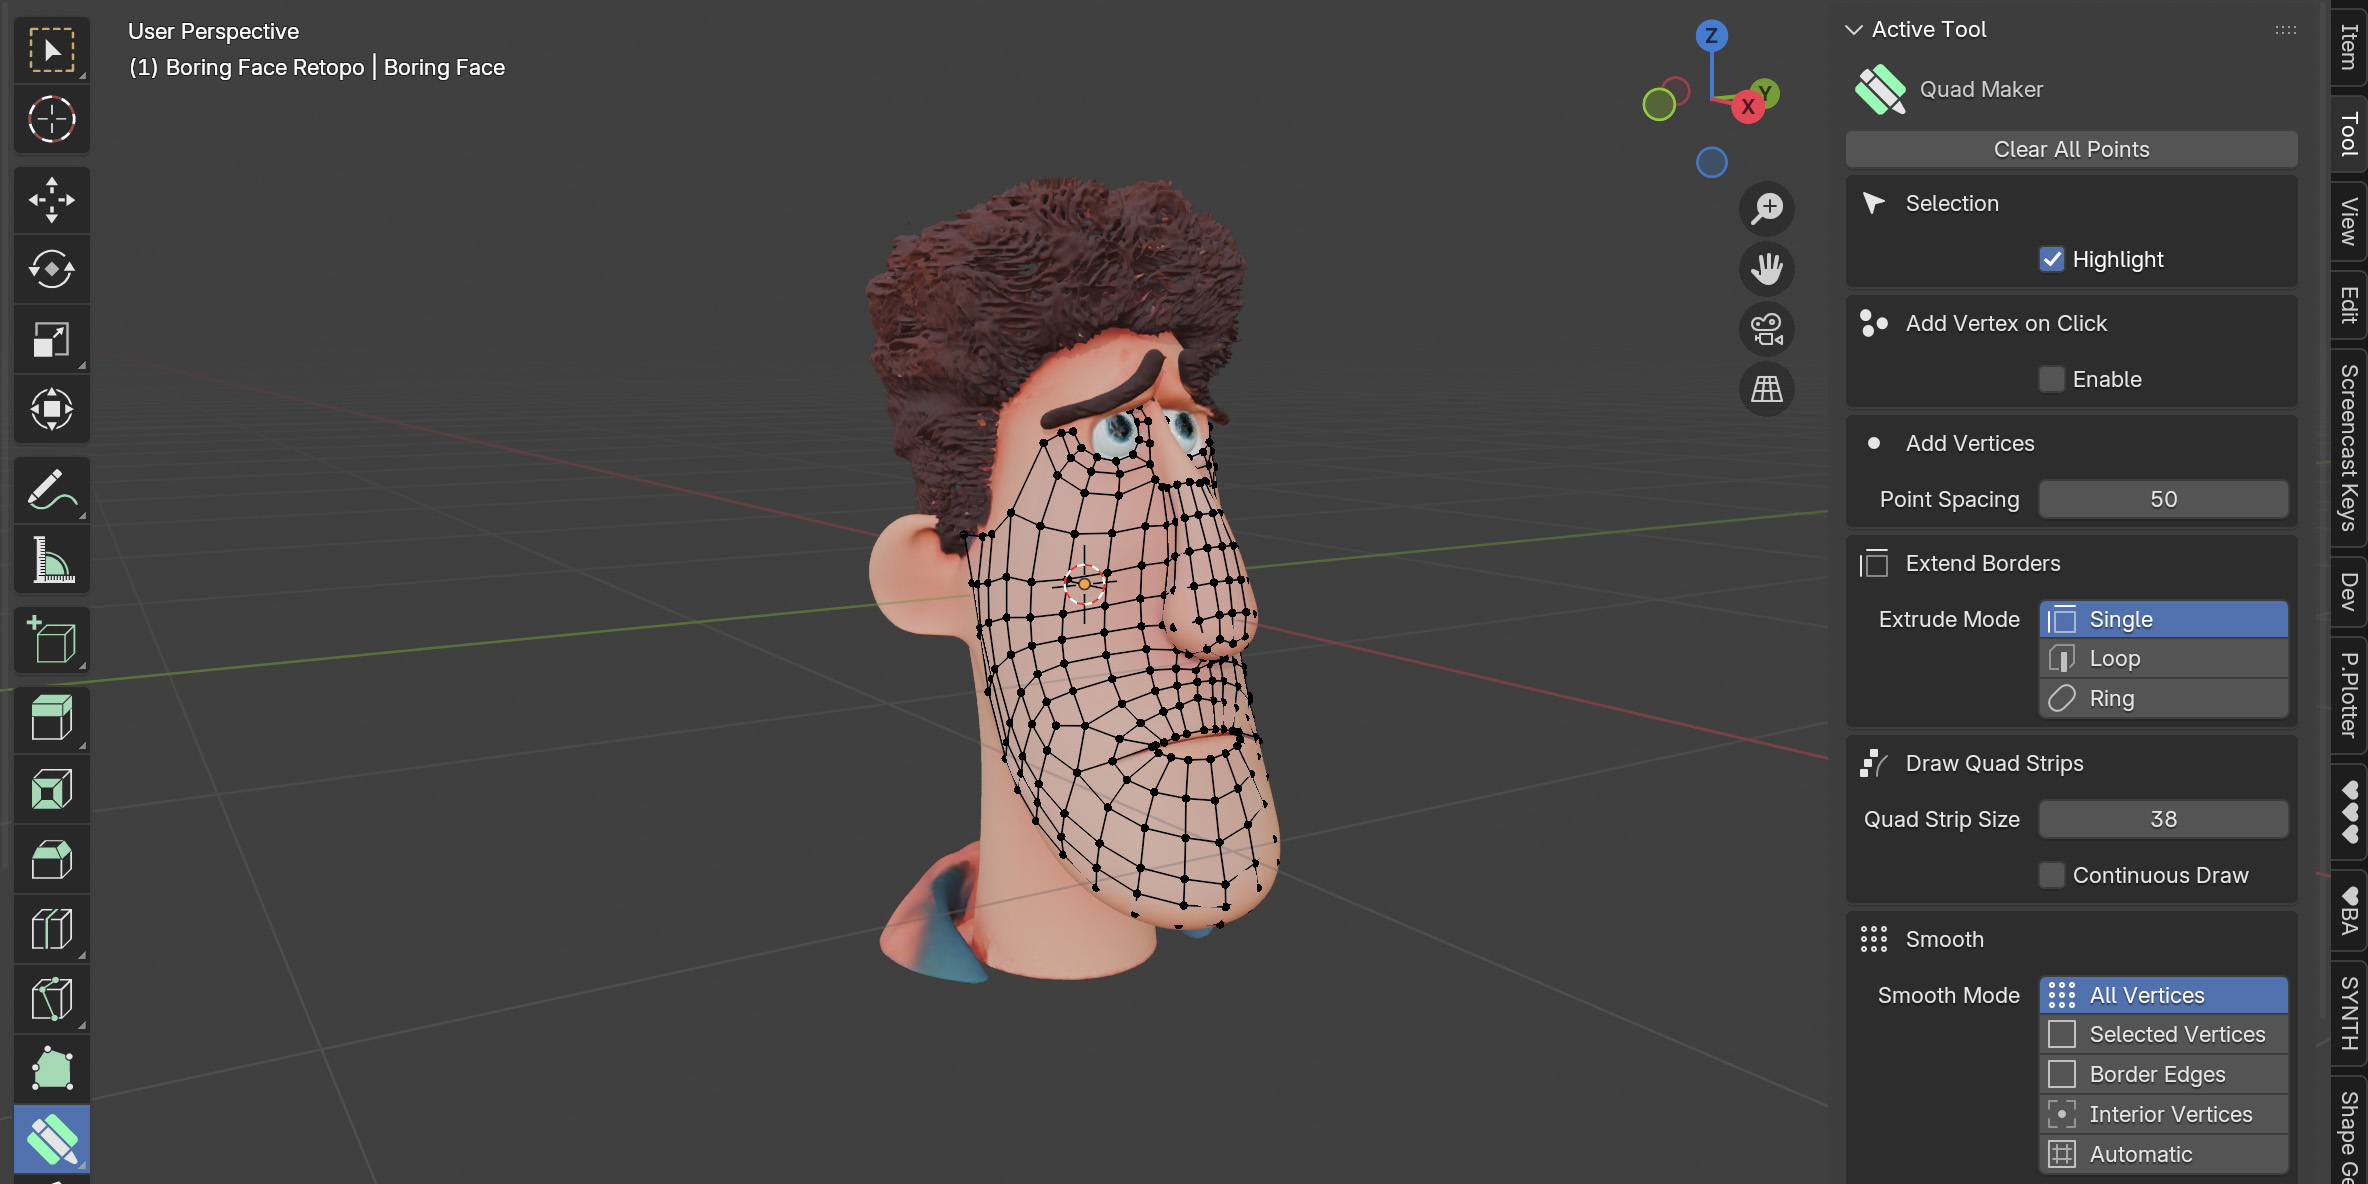
When I first built Quad Maker, I wanted it to be a straightforward tool—something inspired by Maya’s Quad Draw but designed to fit neatly into Blender. That philosophy hasn’t changed.
Keeping Quad Maker focused and “boring” has some real advantages:
It stays simple and easy to learn (see the documentation and video to get started).
It stays stable and reliable. Blender’s Python API already gets pushed hard by Quad Maker, so focusing on core features avoids adding unnecessary complexity.
It helps keep development costs under control. Since Quad Maker is a one-off purchase rather than a subscription, I want to make sure that updates add real value without inflating ongoing costs.
So while I am always open to feature requests, I’m careful to only add the ones that really matter. The result is that Quad Maker remains exactly what it was meant to be: a dependable, no-fuss retopology tool.
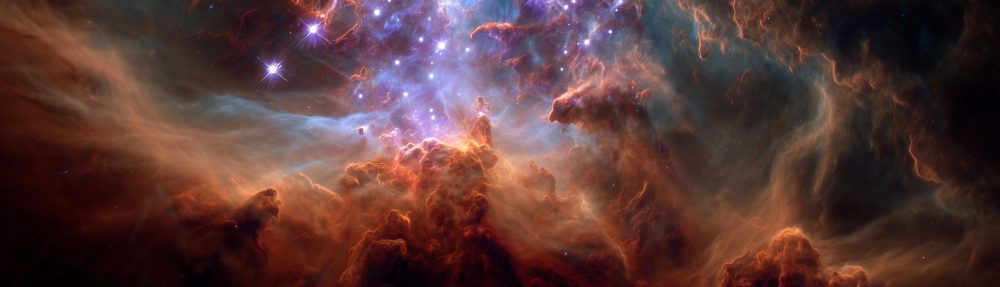
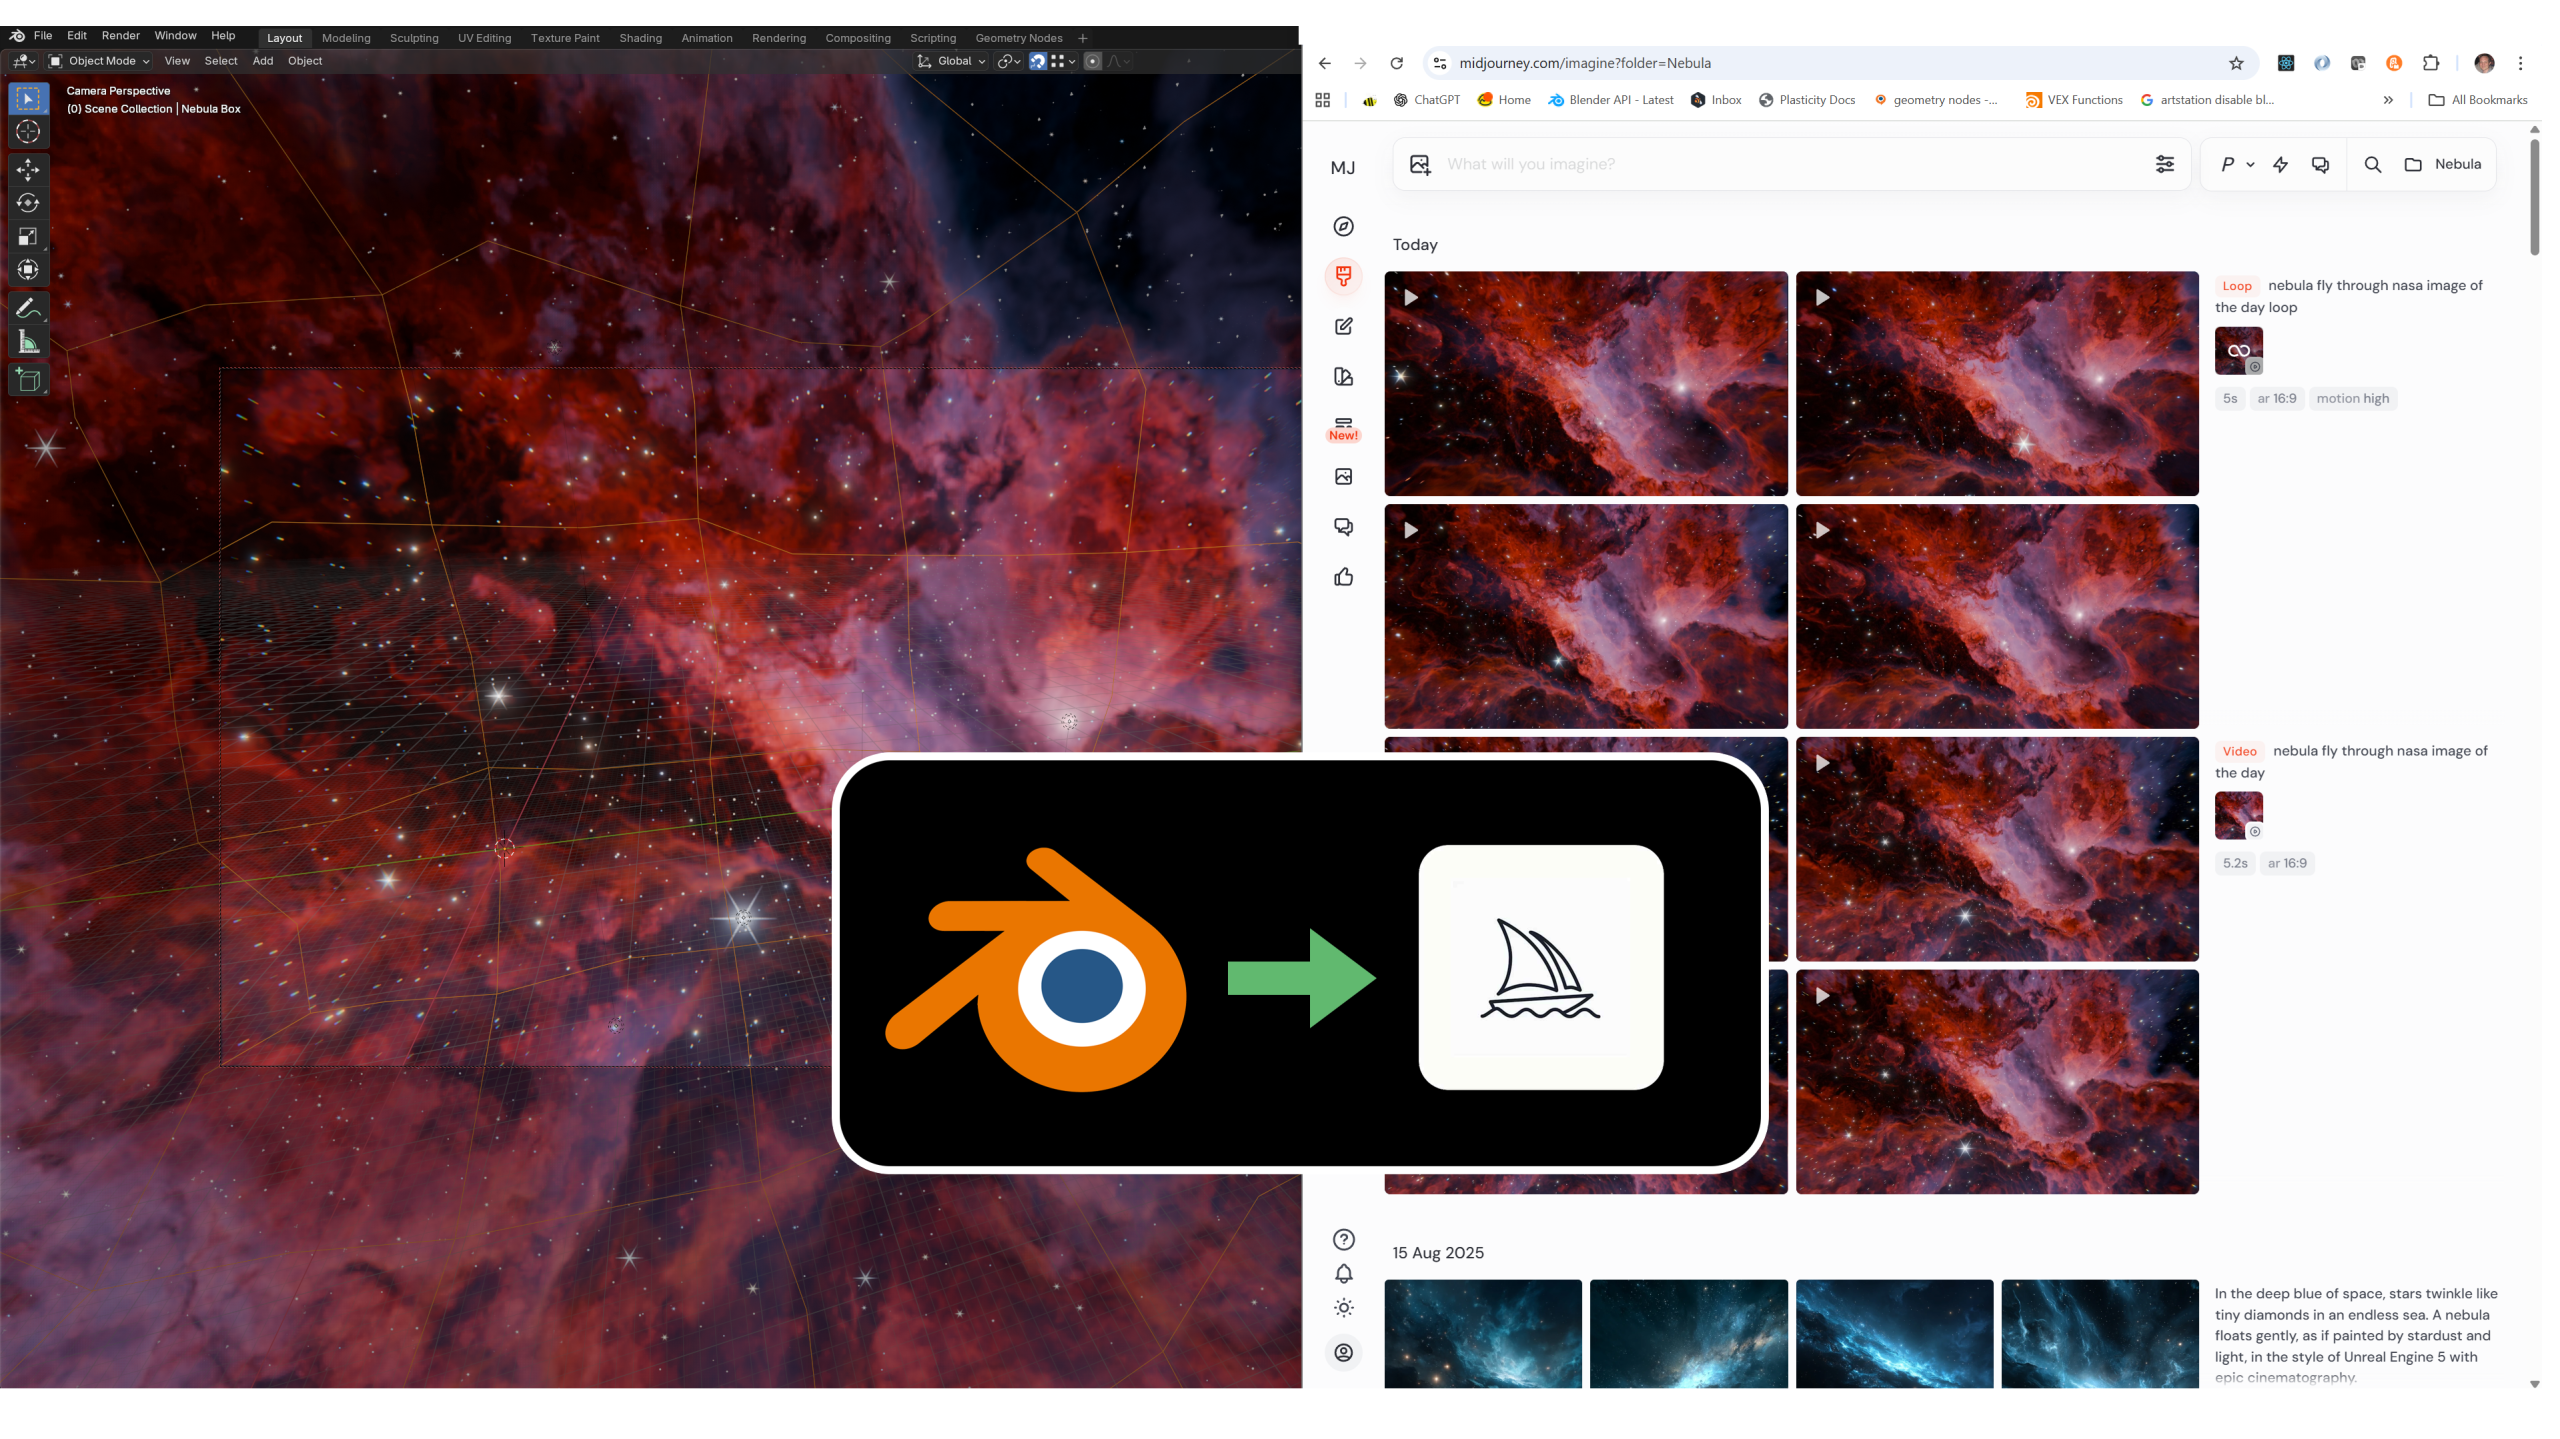
Setting aside the controversies around generative AI tools like Midjourney, this post explores a practical workflow for combining Blender with Midjourney to create volumetric nebula animations more quickly than traditional rendering techniques.
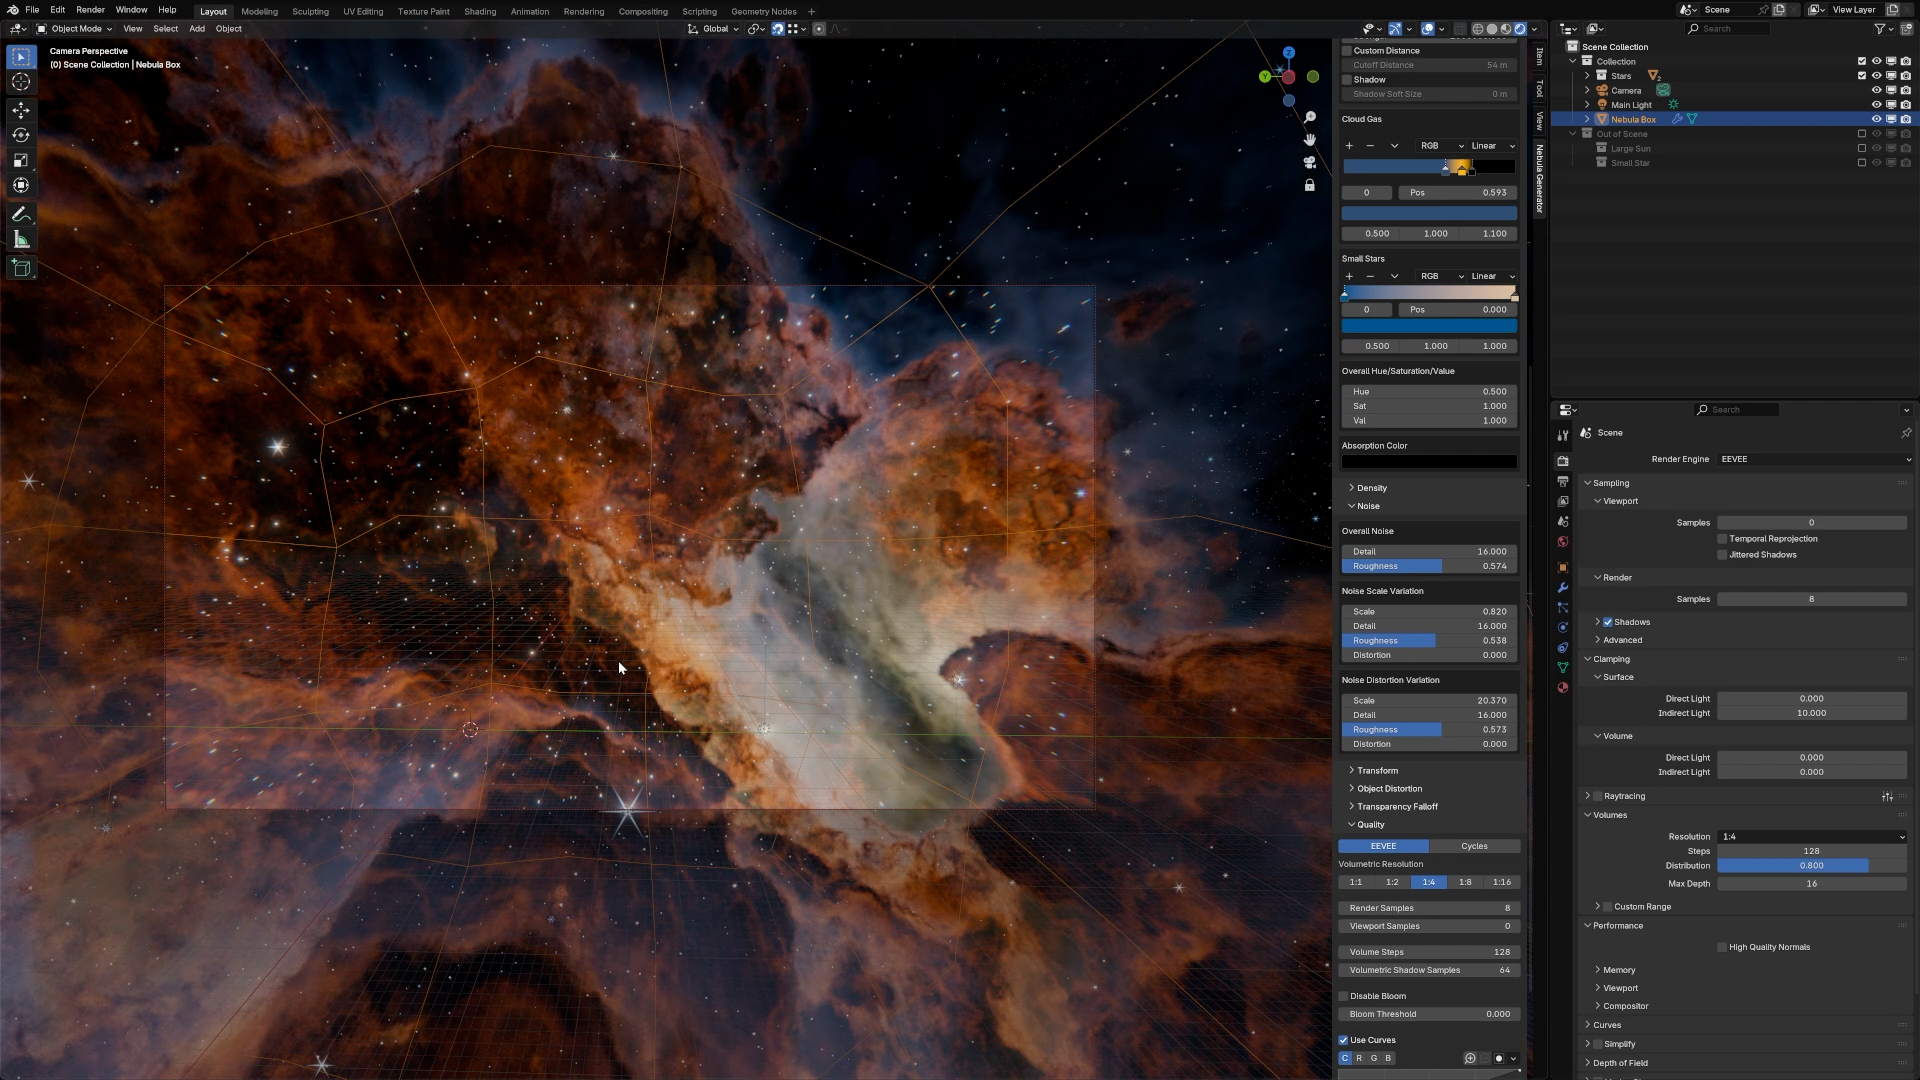
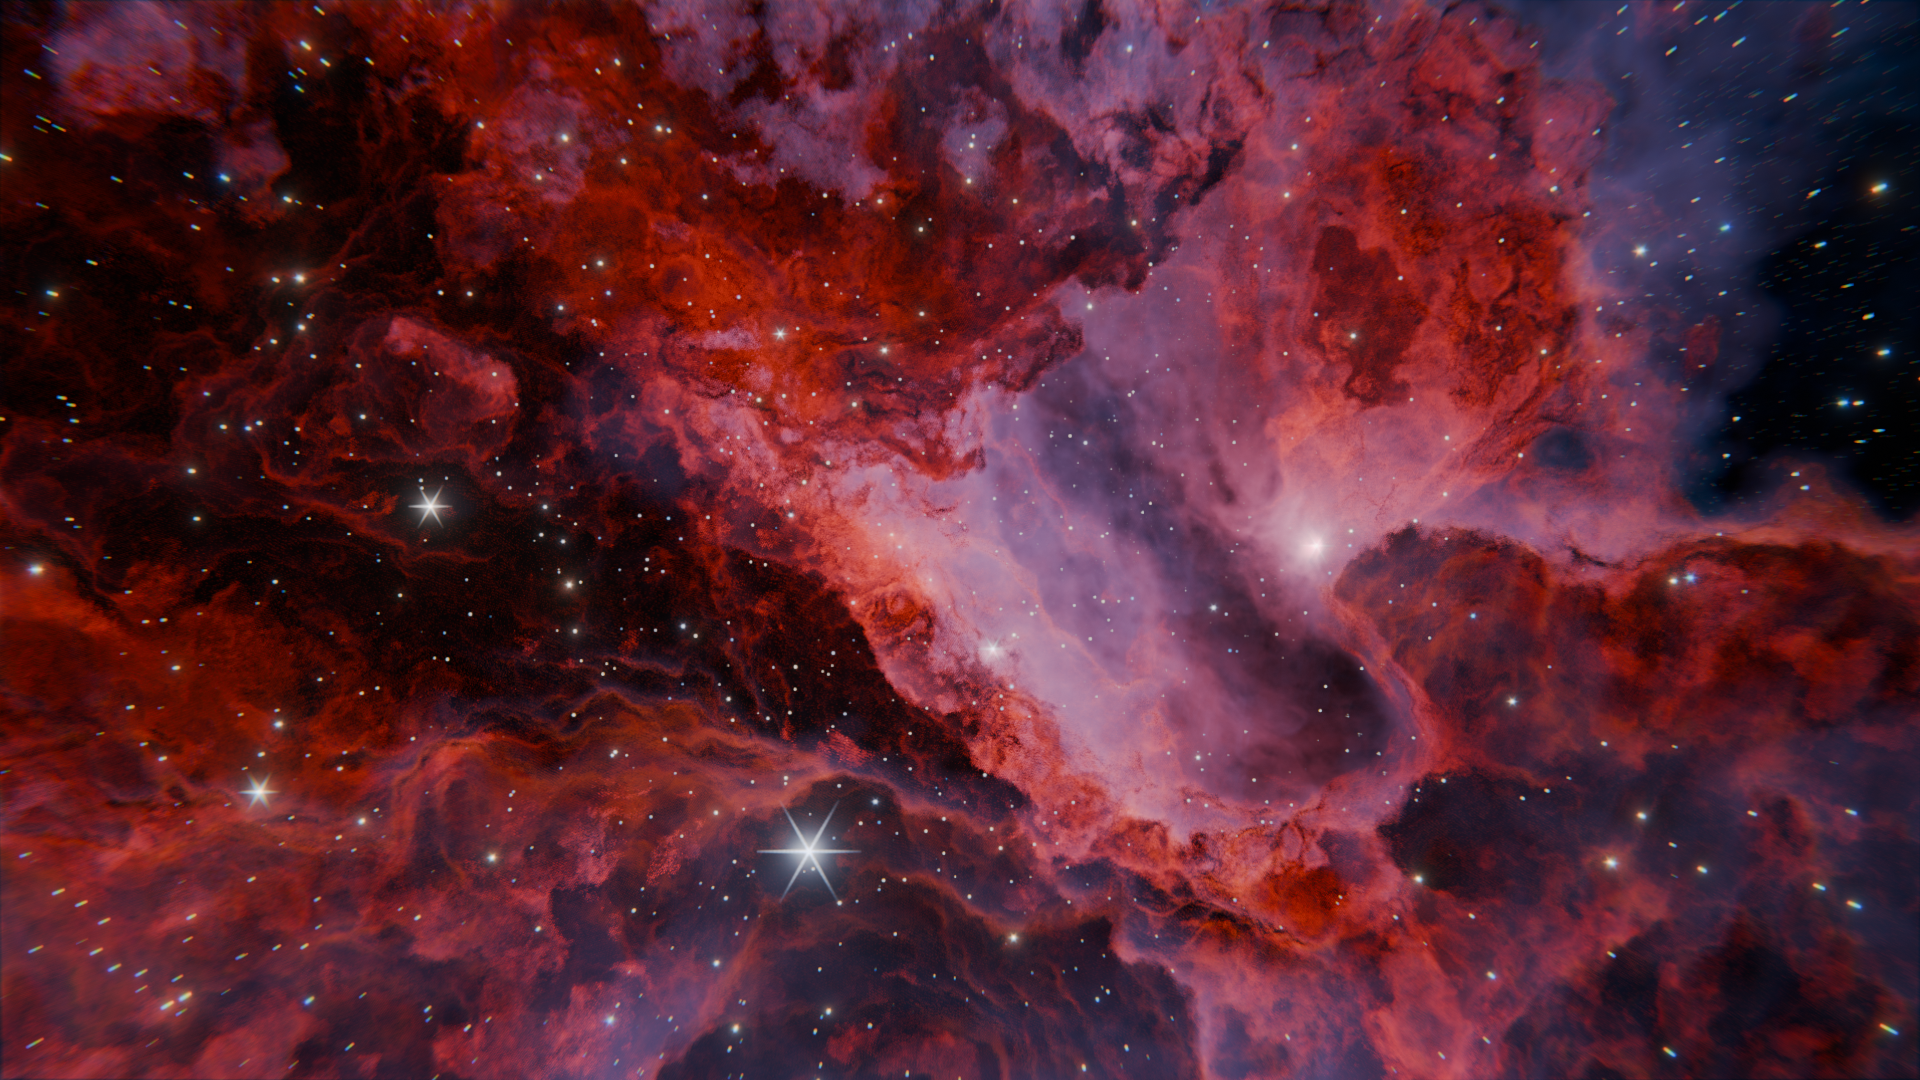
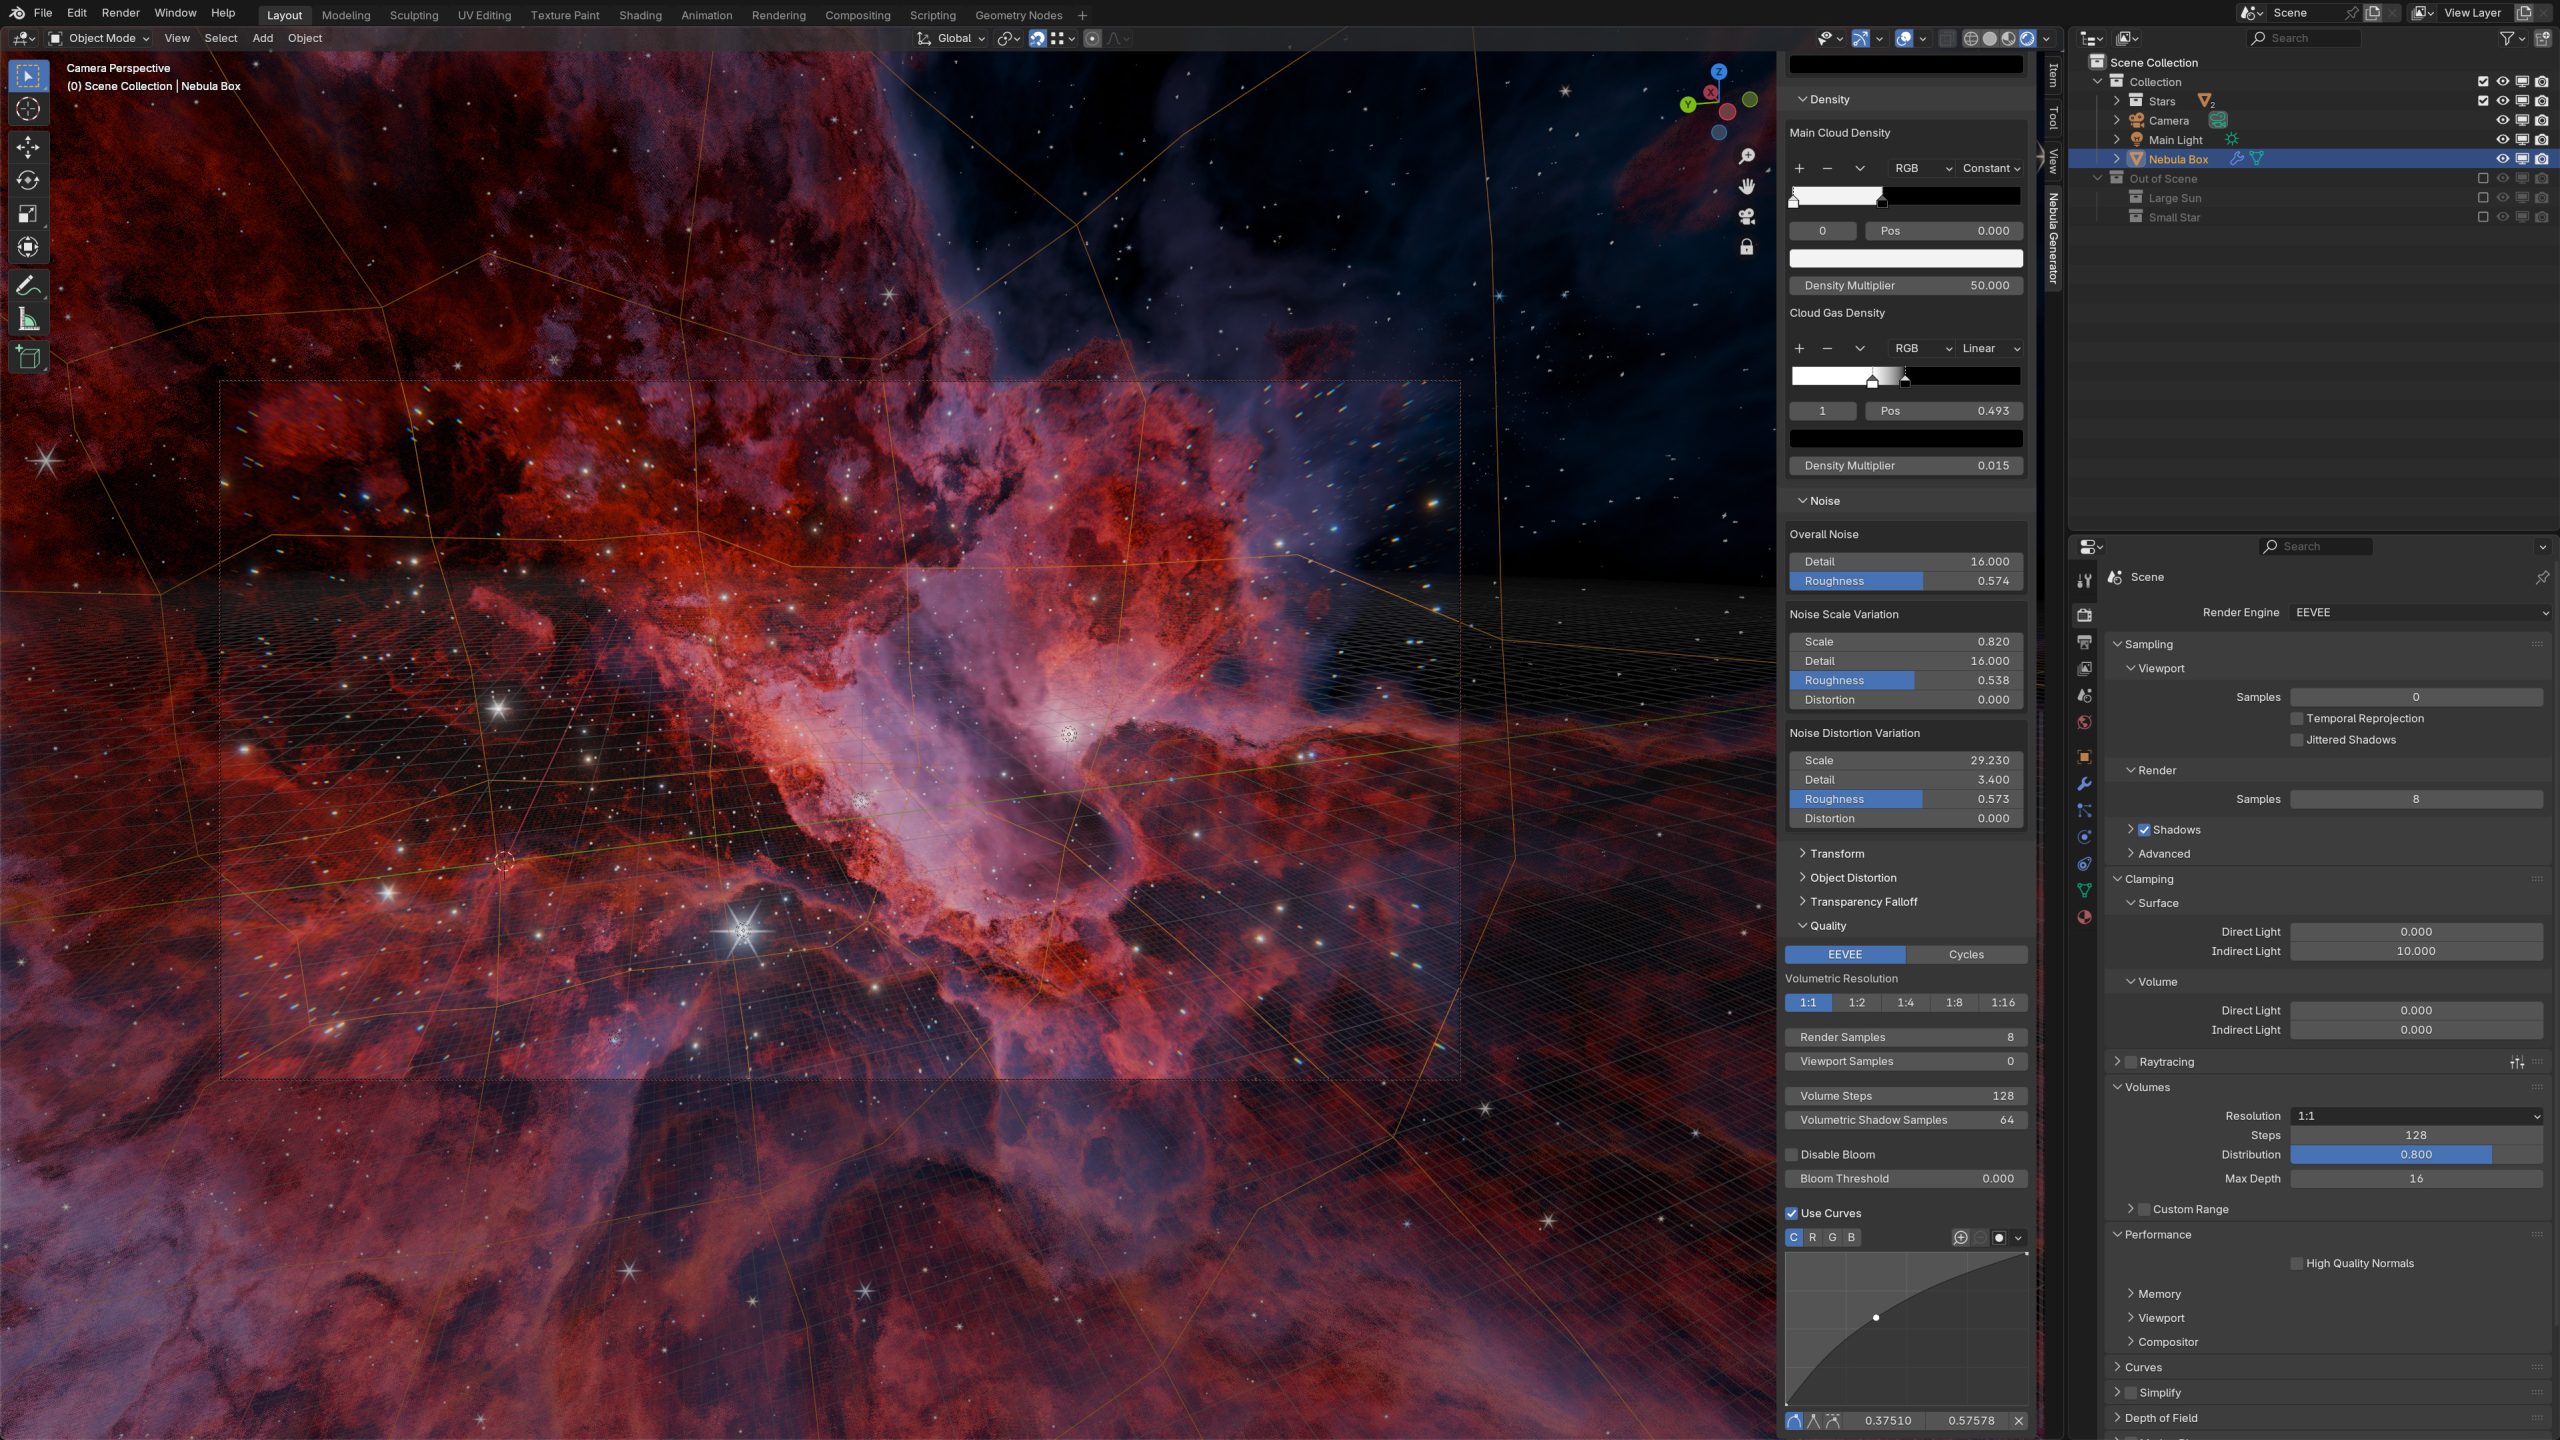
Volumetric nebulae can look fantastic in Blender, but animating them can be time-consuming and prone to artifacts in both EEVEE and Cycles. Midjourney, on the other hand, can generate animations quickly — especially flythroughs of cloud-like structures. In this post, I’ll walk through a workflow that combines both tools: using Blender’s Nebula Generator to create a unique still image, and then feeding that into Midjourney to produce animations — including seamless(ish) loops.
Why Use Midjourney for Animation?
Blender’s Eevee renderer is excellent for creating volumetric still images, but animating those volumes often requires lots of samples to avoid flicker. That translates to long render times, and even then, some artifacts can remain. The same goes for Cycles, which can be more accurate but can take much longer to render.
Midjourney, however, has been trained on massive amounts of cloud-like images and videos. This makes it surprisingly good at generating flythroughs of nebulae. While you lose some fine control over the camera, you gain speed — producing a short animation in seconds instead of hours.
Blender-rendered still imageMidjourney flythrough video frame
Tweak noise and lighting parameters to shape the nebula.
Adjust the coloring to get the atmosphere you want.
Increase the volumetric resolution for higher detail.
Render out a single still image.
I confess that I find this stage the most enjoyable – it lets you stay in control of the artistic look before moving into the scarily efficient world of AI-driven animation.
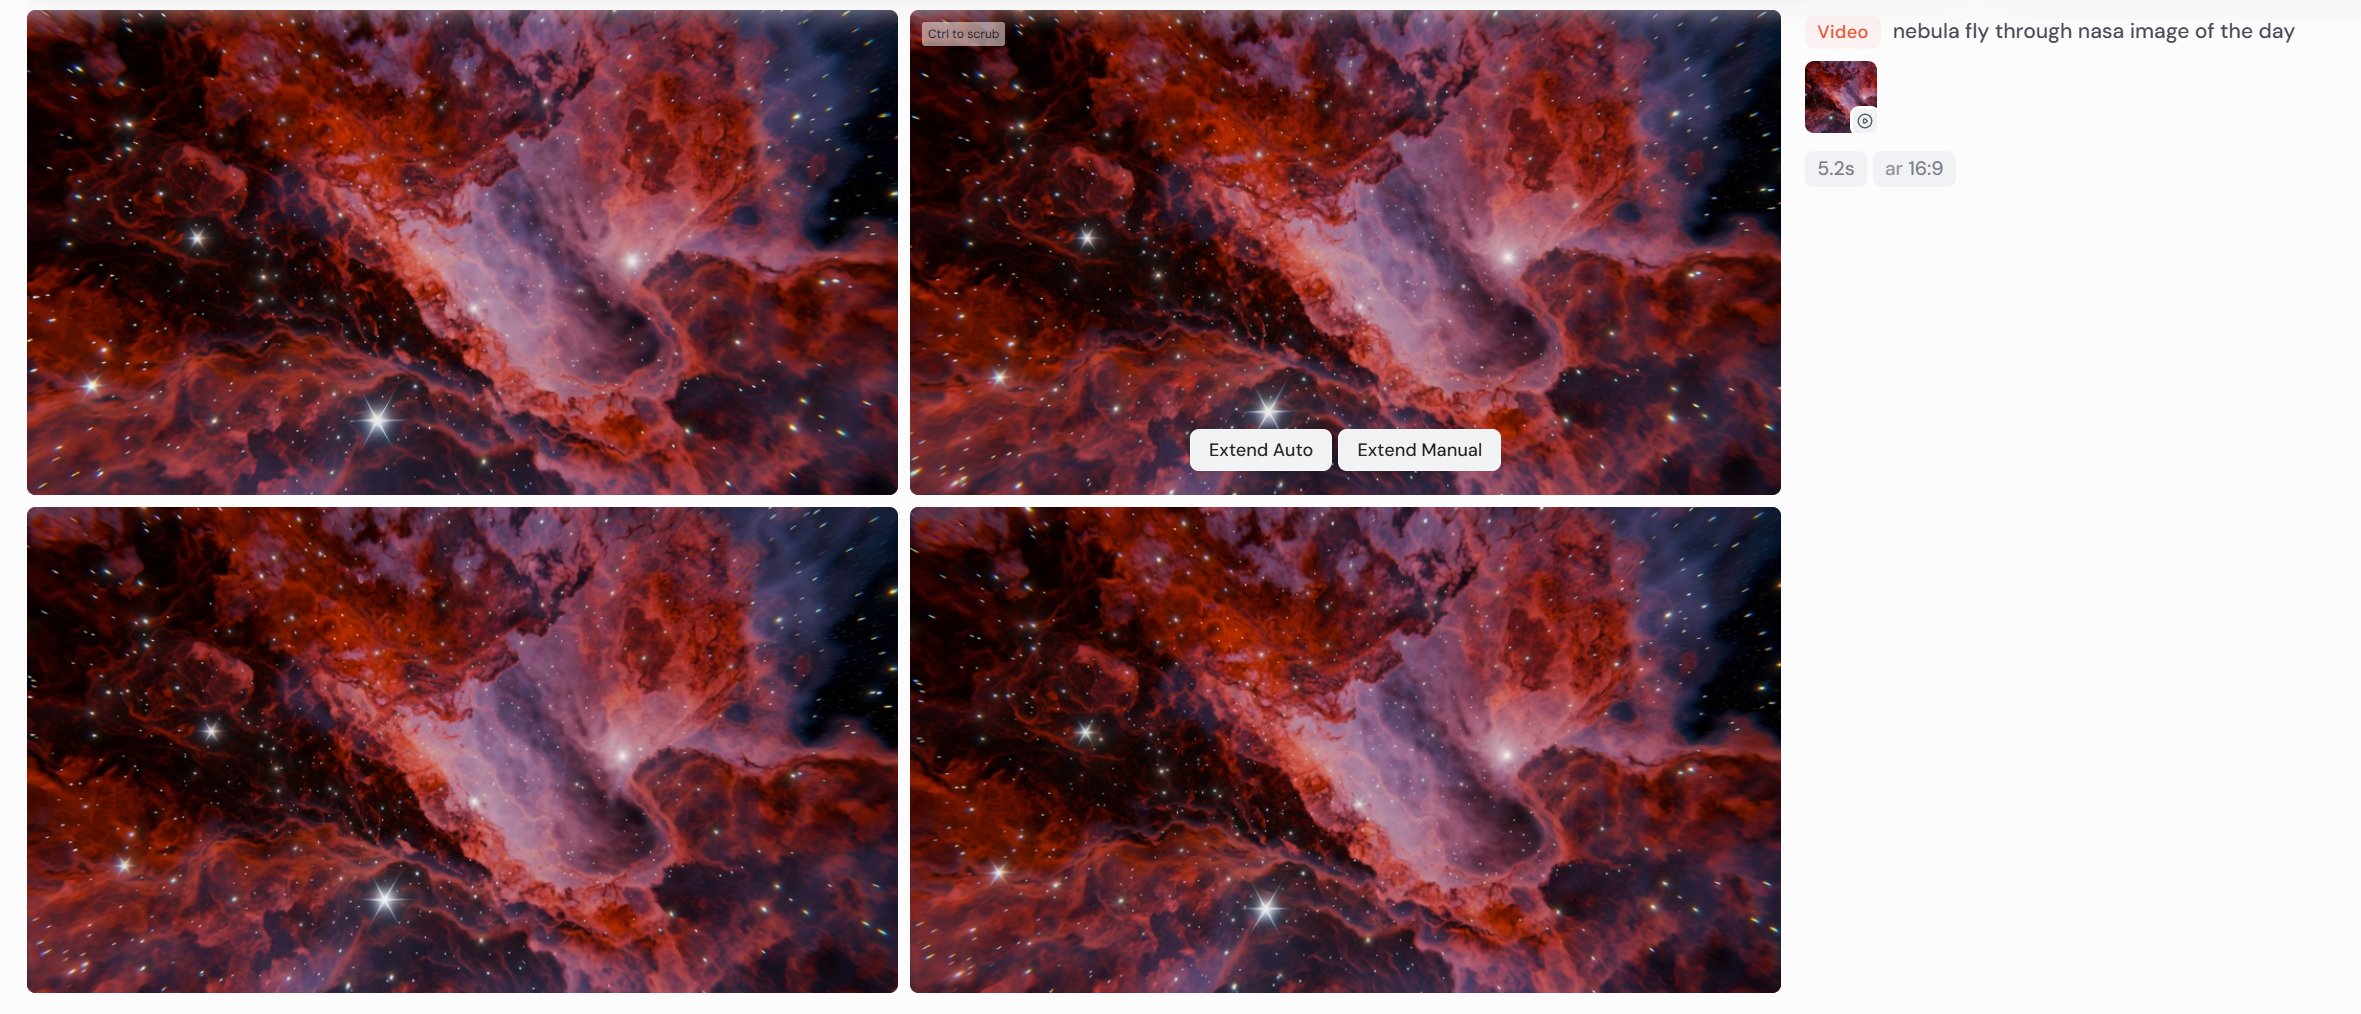
Step 2: Generate a Flythrough in Midjourney
With the Blender still rendered, I switch to Midjourney.
Upload the image into the Creation tab.
Use it not as a finished still, but as a starting frame for an animation.
A simple prompt like “nebula flythrough, NASA image of the day” works well — the phrase flythrough seems to make a big difference.
After hitting generate, Midjourney takes about 30 seconds to produce four short animations. Some will be better than others, but usually at least one is more than workable.
One question I was asked when I first shared this workflow was: Can you make it loop? The answer is yes — with mixed results.
If you set the end frame equal to the start frame and optionally set the Motion to High, Midjourney will attempt to generate a seamless loop. Sometimes it works beautifully, sometimes it doesn’t. A few retries usually yield at least one good loop.
Start vs end frame comparison, showing matching images
Here’s an example where the nebula flythrough loops smoothly, making it perfect for background visuals.
Other examples
Here are some of the more successful examples using this technique. In some cases, I used the still image as a heavily weighted seed to create another still. The last one was rendered in Houdini with the Redshift renderer using a Houdini course I created some time ago.
This last one was created in Houdini and Redshift
Here are a few failures, especially when attempting looped animations – which, in all fairness, would be a challenge for human or machine:
Pros, Cons, and Applications
This Blender + Midjourney workflow offers:
✅ Speed — animations in under a minute. ✅ Uniqueness — still images designed in Blender give your animations a personal touch. ✅ Flexibility — you can prototype quickly, then refine later in Blender if needed.
But there are trade-offs:
⚠️ Less control — you can’t direct the camera as precisely as in Blender. ⚠️ Mixed results — especially with looping animations, some attempts won’t quite work.
Despite this, it’s an excellent way to rapidly prototype or generate atmospheric background sequences.
Wrap Up
By combining Blender’s creative control with Midjourney’s speed, you can create unique nebula animations — both straightforward flythroughs and seamless loops — in a fraction of the time it would take using traditional volumetric rendering alone.
If you’d like to try this workflow yourself, you can check out the Nebula Generator add-on. You don’t have to use it — any still nebula image will work — but it’s a great way to get started.
Have you tried mixing Blender with AI tools like Midjourney? It might feel a little unsettling, but after spending hours myself rendering animations, I must say the results are undeniably impressive.
By supporting these add-ons you also support their continual improvement, so it is a mega help – you also help out the Blender Foundation too as a percentage of each of the add-ons go to them as well.
My current add-ons are:
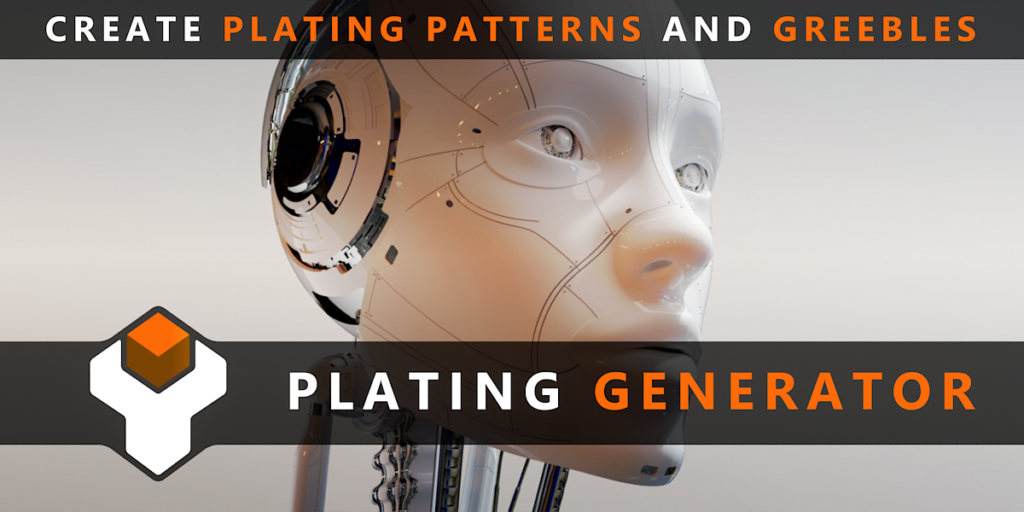
The Plating Generator – Quickly create a configurable mesh in the form of a fighter jet or starfighter.
Shape Generator – Quickly create and configure countless random shapes for a wide variety of purposes.
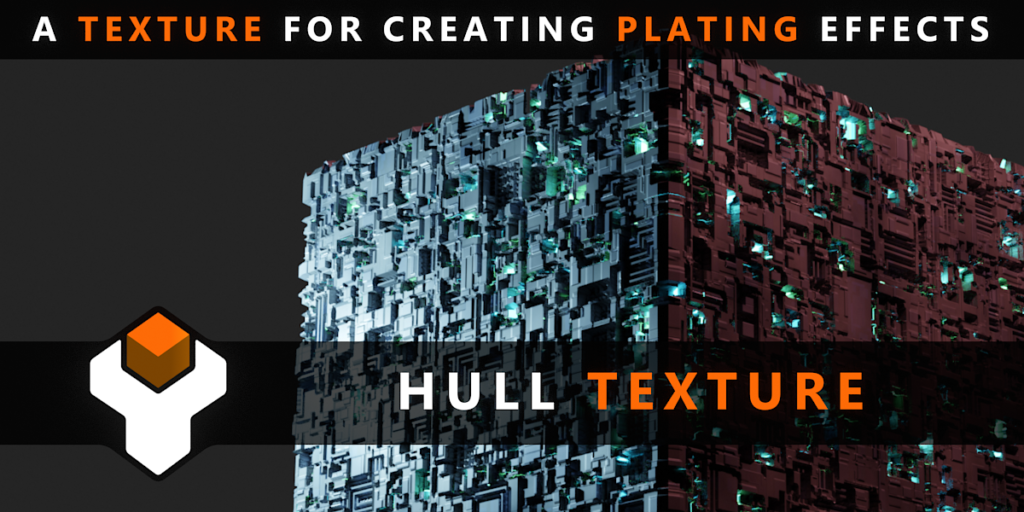
Hull Texture – A versatile, reusable base texture for creating irregular plating effects.
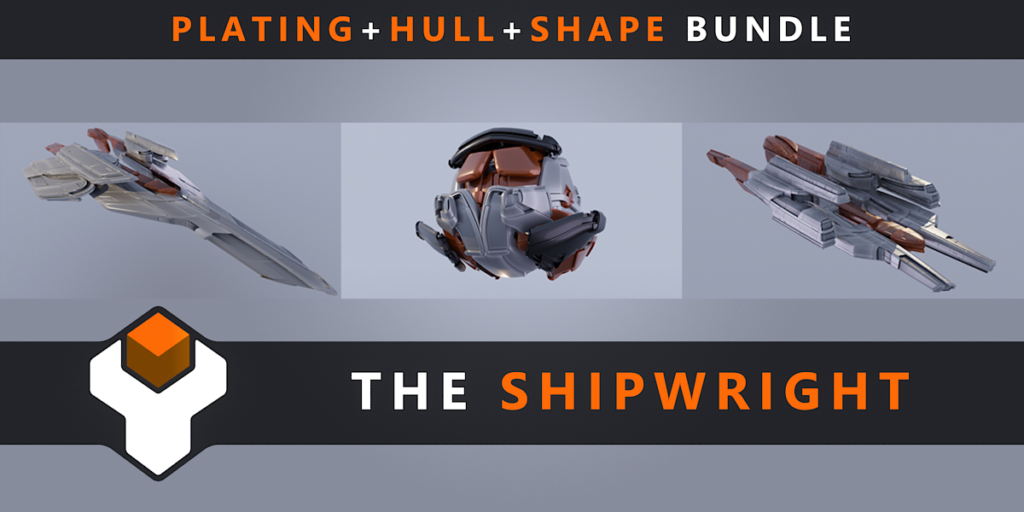
The Shipwright – A bundle of the above add-ons combined with a custom set up for automatic sci fi model generation.
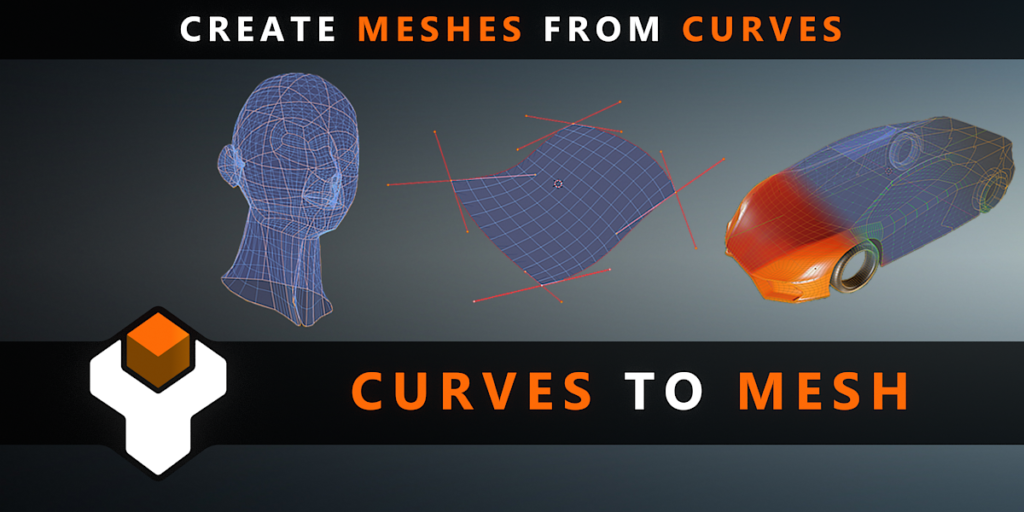
Curves To Mesh – Create and configure mesh surfaces from bezier curves.
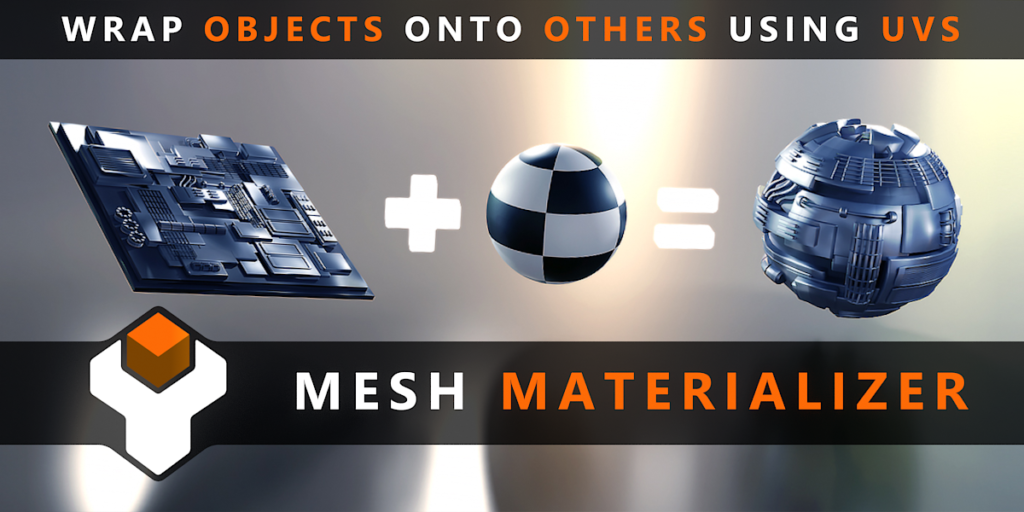
Mesh Materializer – Map objects onto another object using its active UV coordinates.
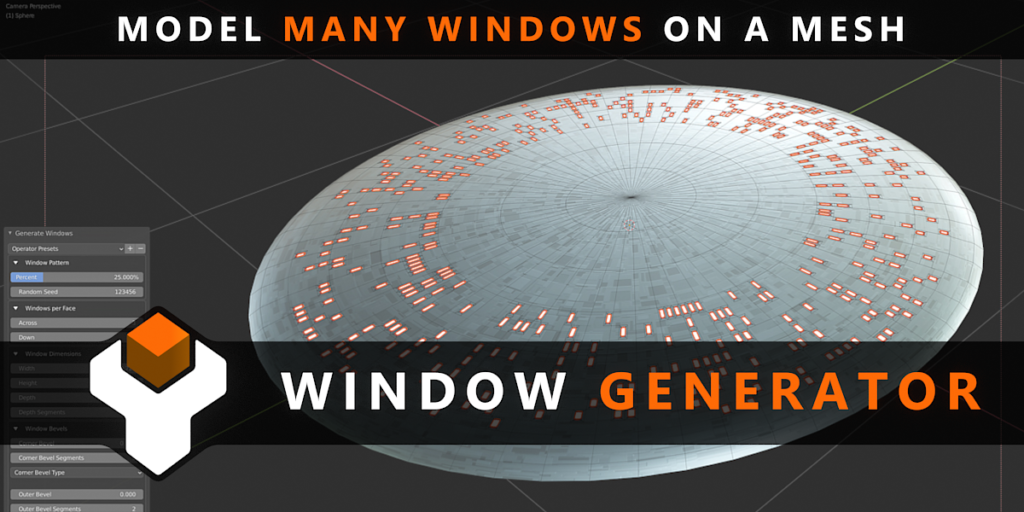
Window Generator – Model many windows at once on the faces of a mesh.
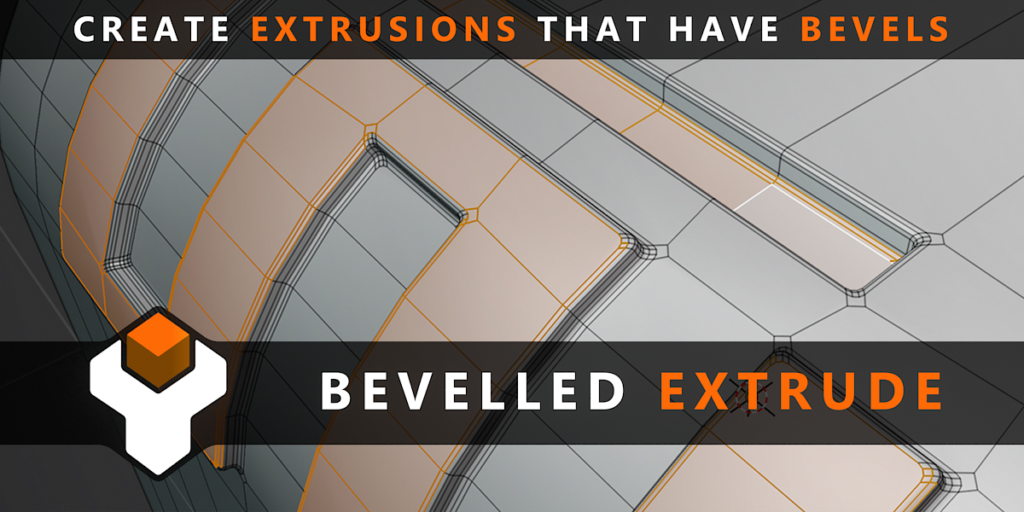
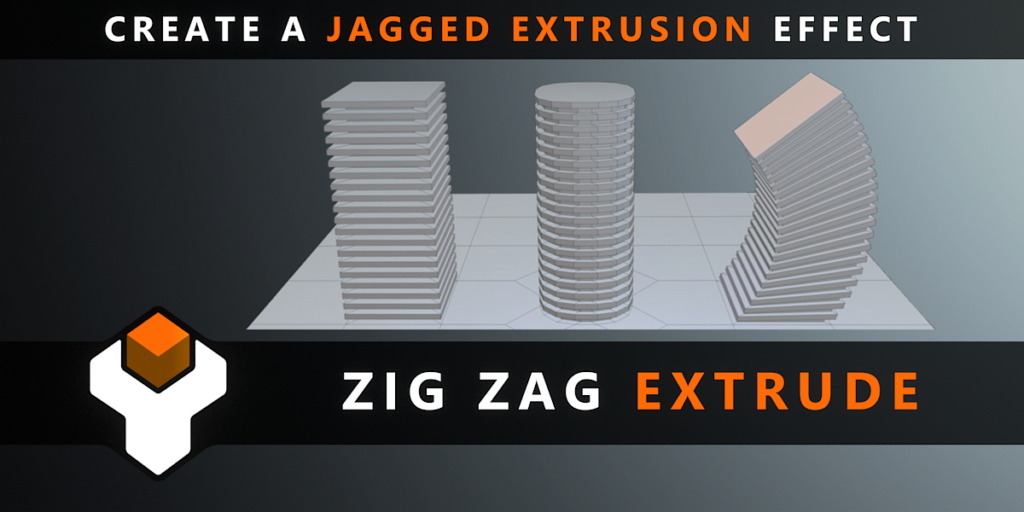
Bevelled Extrude – Create extrusion effects that have configurable bevel effects on the base, corners and tops.
3 years ago I built the 3D Shape Generator to automatically create a variety of unique 3D shapes and objects.
For the latest update I got talking with Marco Iozzi, a professional who has been working in the industry since 1998 as a 3D Artist, Matte Painter and now Concept Artist on productions like Harry Potter, Elysium, Game of Thrones and is currently doing concept art and design on Thor: Love and Thunder.
He downloaded the Shape Generator to help him with his own design work.
He pointed me at Sinix Design, who provides a set of videos on the topic of Design Theory describing the best methods for creating shapes that are appealing and unique.
Sinix spoke about the concept of Big/Medium/Small; the theory that the majority of good designs can be broken down into one large main shape; a medium shape or shapes taking up a smaller amount of the design; and some smaller shapes taking up an even smaller area:
This got me thinking about the Shape Generator; if I can first generate just one large object, automatically scatter medium objects across that, and then scatter smaller random objects across that, I might be onto something.
Once I set this up, it was surprising how many more unique and interesting designs I could quickly generate with the change of a single number.
A sample of the generated shapes using the Shape Generator’s Big/Medium/Small settingsA Screenshot of the Shape Generator’s Big/Medium/Small settings in Blender (Also available in Houdini)
With the help of Marco’s feedback, I’ve also introduced a host of other improvements:
Along with the Big/Medium/Small controls, a new integrated panel allows you to easily revisit and change your settings which now include more material controls, Boolean settings, and easier to install Presets.
A new Iterator function, much like the one I coded with Chipp Walters in KIT OPS SYNTH, allows you to quickly render out countless variations to quickly let you pick a design to take forward.
The new Bake feature allows you to combine all the individual shapes into one so you can continue to model or sculpt your chosen design to the next level of detail. I’ll talk about each of these new features more in the next few videos. I hope you’ll enjoy these updates to the Shape Generator and find it useful in developing your own designs.
Each of these features are covered in the following videos:
I hope you’ll enjoy these updates to the Shape Generator and find it useful in developing your own designs.
It’s often been requested, and here it is – an introductory tutorial on converting a curve network to a mesh in Blender using my Curves to Mesh add-on. Any questions, do let me know….enjoy!
I stumbled across an interesting displacement technique that’s useful for subtle parallax type effects and ripple distortions. Using this technique, you can add movement effects to still images such as clouds to give them the appearance of movement as the camera travels over them.
The above video talks about the technique, and I’ve added a simple Node Group I developed for it up for download at Gumroad and Blender Market.